How to Make a 9 Patch Quilt Block Tutorials
Quilting might look complicated at first, but the truth is, it’s built on very simple ideas. Most quilts are made by repeating small fabric pieces, usually squares, and arranging them in creative ways.
If you’re just starting out, the best thing you can do is begin with a pattern that is easy, forgiving, and still looks beautiful when finished. That’s exactly where the nine patch quilt block comes in.One of the easiest and most beginner-friendly quilt blocks you can try is the nine patch quilt block. It’s simple, structured, and perfect for learning the basics while still creating something that looks really beautiful when finished. See this for more: How to bind a quilt
Traditionally, a nine patch block is made by sewing together nine individual squares arranged in three rows of three. While that method works just fine, it can feel a bit slow and repetitive, especially when you’re making multiple blocks.
The nine patch is one of the most beginner-friendly quilt blocks you can ever try. It’s simple, structured, and gives you endless room to play with colors and patterns. But here’s the best part you don’t have to make it the slow, traditional way. Check this: 15 scrap fabric quilt ideas
In this tutorial, I’m going to show you my favorite “cheater” method a faster, easier way to create nine patch blocks without cutting and sewing nine individual squares every single time.
Materials You’ll Need
Before we start, gather these simple tools:
- Fabric (at least 3 different patterns or colors)
- Pre-cut strips (2.5 inches wide) OR fabric you can cut yourself
- Scissors or rotary cutter
- Ruler or measuring tape
- Sewing machine or needle and thread
- Pins (optional but helpful)
- Iron Beginner Tip: Don’t stress about having perfect tools. Start with what you have.
Step 1: Prepare Your Fabric Strips
To begin, you’ll need fabric strips that are 2.5 inches wide.
- If you’re using pre-cut fabric strips (like jelly rolls), you’re good to go
- If not, simply cut your fabric into long strips that are 2.5 inches wide
These strips usually run from one end of the fabric to the other (about 44 inches long).
Step 2: Sew Your First Set of Strips Together
Now take 3 different fabric strips.
- Place the first and second strip right sides together (the nice sides facing each other)
- Sew along the long edge
- Add the third strip and sew it to the second strip
When you’re done, you’ll have one long piece made of 3 strips joined together side by side
It’s a long seam, but very easy just sew straight.
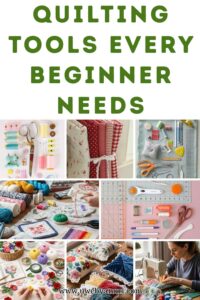
If you love to see more projects see: Quilting tools every beginners needs
Step 3: Press Your Seams
Take your iron and gently press the seams flat.
- This helps your fabric lay neatly
- It also makes your final block look more professional
Don’t skip this step it makes a big difference!
Step 4: Cut the Strip Set into Smaller Pieces
Now it’s time to cut your long strip into smaller sections.
- Measure and cut 2.5-inch pieces across the strip
Each piece you cut will already have 3 small squares joined together.
Step 5: Repeat with Different Fabric Combinations
To make your quilt more interesting, repeat the process:
- Choose 3 new strips
- Sew them together
- Press
- Cut into 2.5-inch sections
You can make as many variations as you like. The more combinations you have, the more fun your quilt will look.
Step 6: Arrange Your Pieces into a 9 Patch
Now take 3 of your cut pieces and arrange them.
- Stack them in 3 rows
- Each piece already contains 3 squares
So when arranged, they form a full 3×3 grid (9 squares total)
Step 7: Sew the Rows Together
Now sew your pieces together:
- Sew the first row
- Sew the second row
- Sew the third row
Then:
- Join the top row to the middle row
- Add the bottom row
Step 8: Press and Square Your Block
Once your block is complete:
- Press it flat with your iron
- Trim the edges if needed to make it even (this is called “squaring up”)
If you used a ¼ inch seam allowance, your block should measure about:
6.5 x 6.5 inches
Step 9: Decide How to Use Your Blocks
Now that your block is ready, you have options:
- Sew multiple blocks together to form a quilt
- Add plain fabric squares between blocks
- Use sashing (strips between blocks for spacing)
If you’re adding plain squares, cut them to 6.5 inches so everything matches.
Beginner Tips for Success
- Take your time accuracy matters more than speed
- Always cut your fabric carefully
- Press your seams as you go
- Don’t worry about perfection practice improves everything
Final Thoughts
The nine patch quilt block is a perfect place to begin your quilting journey. It’s simple, flexible, and incredibly satisfying to make.
And with this “cheater” method, you’re not just saving time you’re making the process more enjoyable and less overwhelming.
Start with one block. Then make another. Before you know it, you’ll have a full quilt coming together piece by piece.
And honestly? That’s the beauty of quilting small steps creating something meaningful.