15 Things Wish I Knew Before I Started Sewing
Sewing has a way of teaching lessons you don’t realize you need; lessons you only understand after you’ve made mistakes. When I first opened a sewing kit, I felt like I had stepped into a tiny mystery world: needles, threads, and fabric swatches everywhere, and a pattern that looked more like a maze than a guide. I thought, “How hard can this be?” It turned out to be harder than I imagined, but also far more fun. This post shares the things I wish I knew before I started sewing.
As a beginner, I pictured myself breezing through projects, making cute clothes and home décor, and impressing everyone with my skills. In reality, I spent the first few months battling patterns, misreading instructions, and wondering why my seams refused to be straight. It was confusing, frustrating, and sometimes hilarious in hindsight.
What I wish I’d known is that sewing isn’t just about following instructions or having the right tools. It’s about patience, attention to detail, understanding patterns, and learning to troubleshoot before frustration takes over. Every mistake teaches something valuable, but a few insider tips from the start can save you time, fabric, and stress.
In this post, I’m sharing 15 things I wish I knew before I started sewing. These lessons are practical, beginner-friendly, and designed to help you feel confident, enjoy the process, and actually finish projects. You’ll also find links to guides like 21 Easy Sewing Projects for Complete Beginners and how to read a sewing pattern, so you can explore related tips as you go.
By the end, you’ll have a toolkit of lessons that makes sewing less intimidating, more fun, and a lot more rewarding, even if you’re starting from scratch.
15 Things Wish I Knew Before I Started Sewing
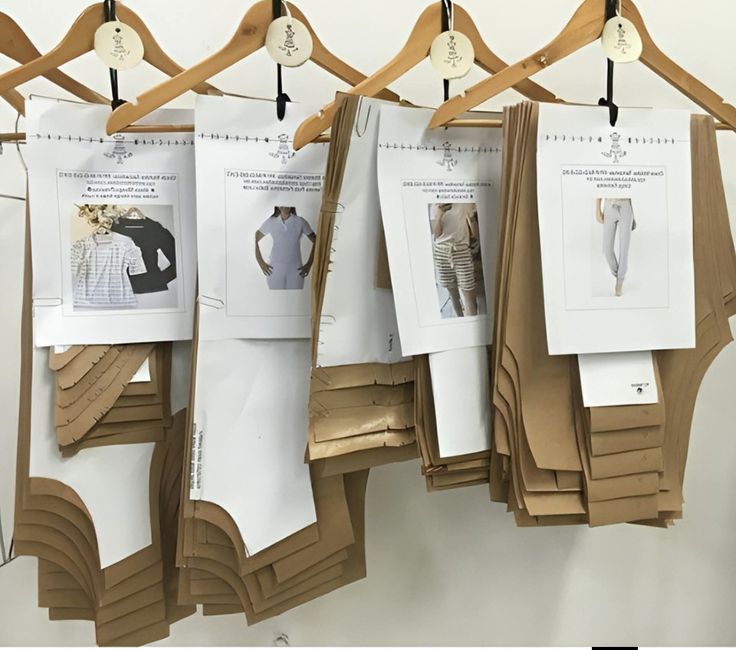
Lesson 1: Understanding Your Pattern Before You Cut
When I first started sewing, I remember picking up a pattern and immediately grabbing my scissors. I thought, “I’ll just cut the pieces and figure it out as I go.” Within minutes, I realized I had cut the wrong size, and one sleeve was upside down. My fabric was ruined, and I felt frustrated.
To avoid this, always take time to read and understand your pattern before cutting. Look at the envelope, check the size chart, and identify all the pieces. In addition, note the grainlines, notches, and any markings that indicate folds or darts. This single step can save hours of frustration and wasted fabric.
For beginners, it’s also helpful to practice with a scrap fabric first. Cut out the pattern as if you were doing the real thing, and pin the pieces together without sewing. This helps you see how all the parts fit before committing. If you’re just starting, our guide on how to read a sewing pattern can give extra clarity.
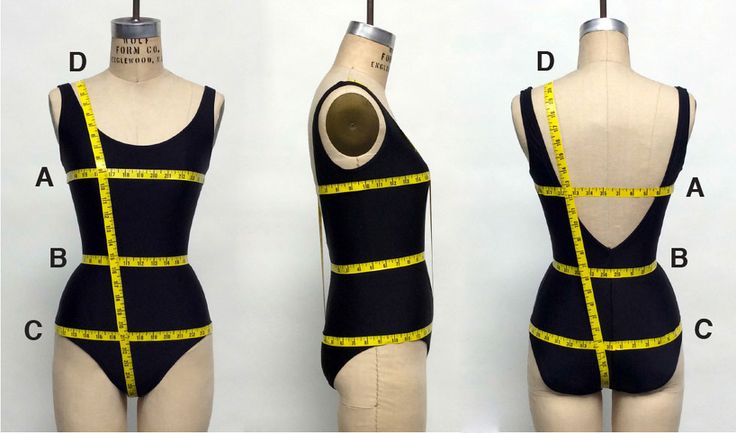
Lesson 2: The Importance of Accurate Measurements
I once tried sewing a top without measuring myself. I assumed I was a standard size, cut the pieces accordingly, and ended up with a garment that was way too tight across the shoulders. I learned the hard way: never guess your measurements. This is one of the things I wish I knew before I started sewing.
Before you start a project, measure your bust, waist, hips, and any other relevant areas. Compare these to the size chart on your pattern envelope. If your measurements fall between two sizes, choose the larger size because you can always take in the seams later.
Accurate measurements also make it easier to adjust patterns for your body shape. For beginners, this is a skill that pays off immediately. If you want a detailed guide on taking precise measurements, check out our post How to Take Accurate Body Measurements.
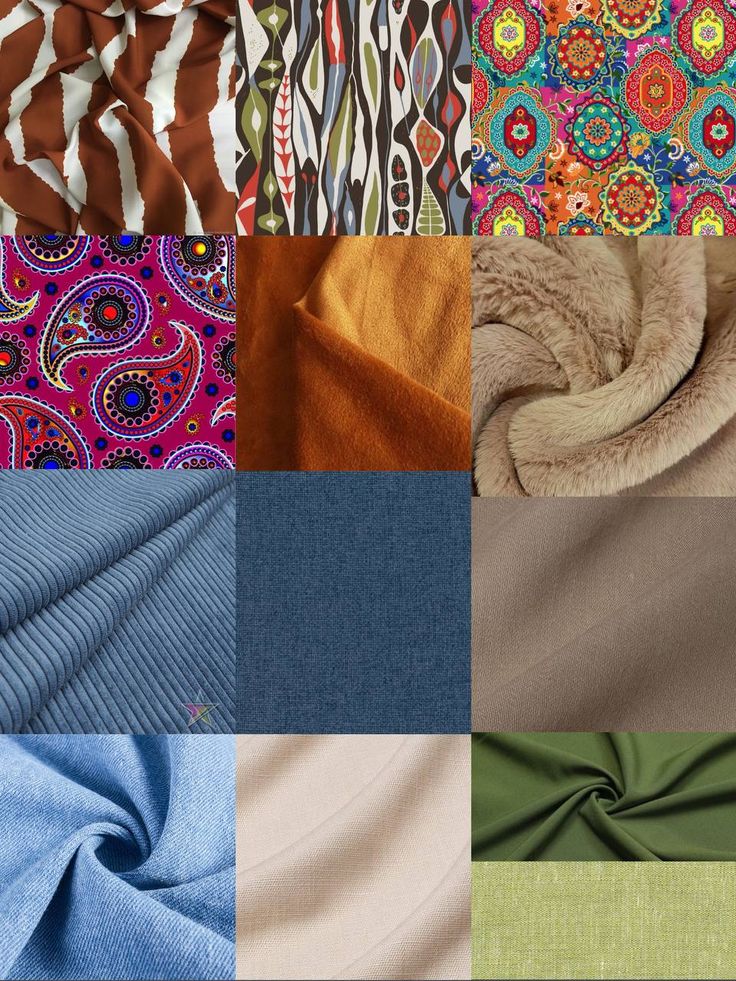
Lesson 3: Choosing the Right Fabric Matters
I remember the excitement of picking a bright, silky fabric for a beginner dress. It looked gorgeous in the store, but once I tried to sew it, the fabric slipped everywhere, and I ended up with uneven seams and puckering. Not fun.
Ensure that you always choose beginner-friendly fabrics. Cotton and linen are great for practice. They’re stable, easy to cut, and forgiving when you make mistakes. Save slippery silks, chiffons, or stretchy knits for when you feel more confident.
Also, pay attention to the fabric recommendations on your pattern envelope. Some patterns are designed for lightweight fabrics, while others need medium-weight material. Matching your fabric to the pattern makes sewing easier and ensures your finished project looks professional.
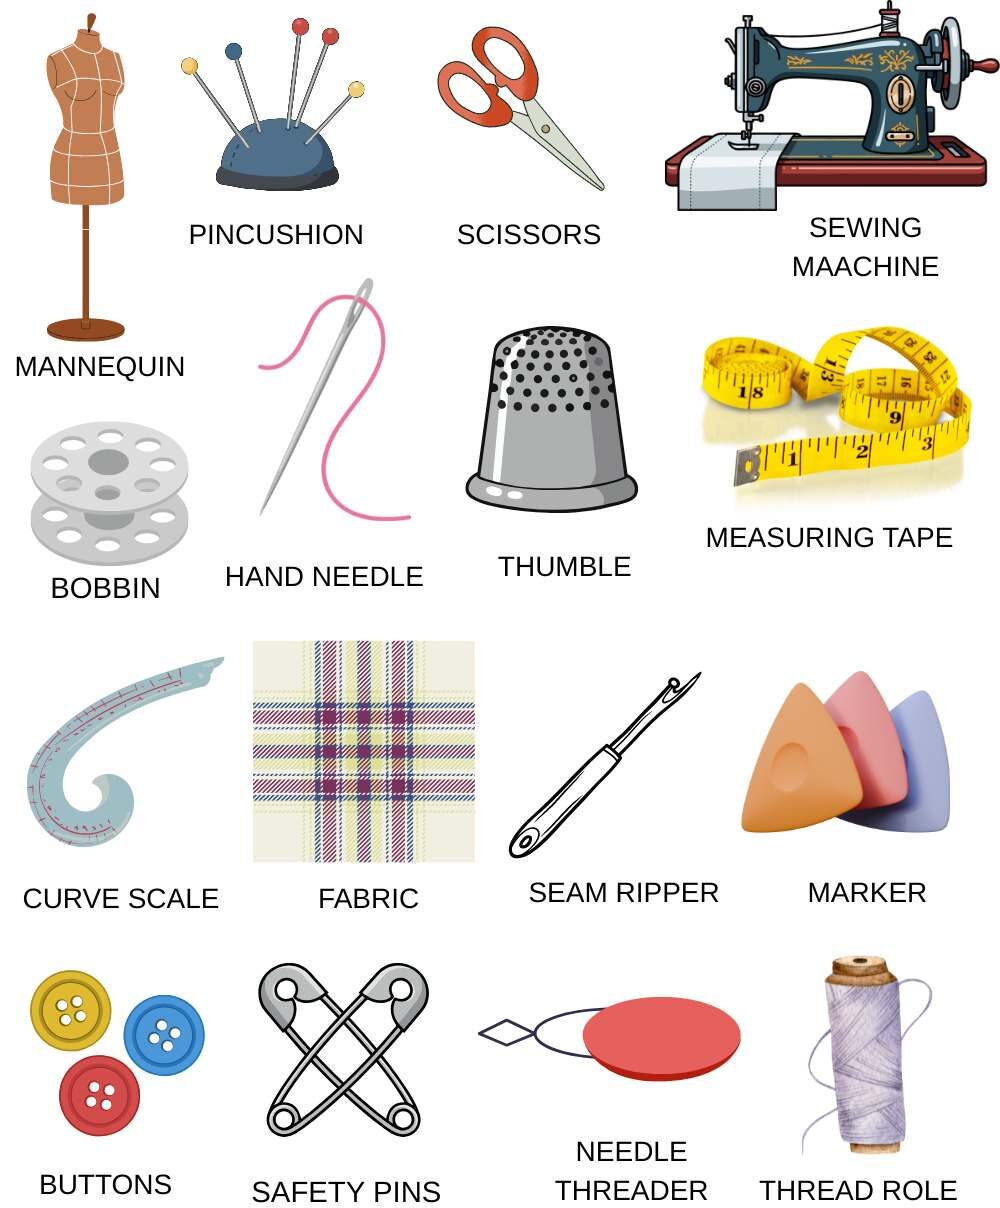
Lesson 4: Tools Can Make or Break Your Experience
Early on, I thought I could sew with any scissors, pins, or thread I had lying around. I quickly realized that dull scissors, weak thread, or the wrong needle type can ruin your work. One time, my needle broke mid-stitch and left a hole in my fabric which is frustrating and avoidable.
Investing in basic, quality tools makes a huge difference. Essential items include:
- Sharp fabric scissors
- Pins and clips
- Good quality thread
- A seam ripper
- A measuring tape and ruler
With these tools, your sewing becomes smoother, mistakes are easier to fix, and you save time. For beginners, having the right tools can boost confidence significantly. If you’re unsure which tools to start with, our post 21 Easy Sewing Projects for Complete Beginners lists beginner-friendly tools alongside project ideas.
Lesson 5: Test, Don’t Just Dive In
I used to start sewing and hope for the best, assuming the first try would be perfect. More often than not, I ended up with crooked seams or a garment that didn’t fit. I learned the value of testing before committing.
This can mean:
- Making a practice garment in cheap fabric
- Testing stitches and tension on scrap fabric
- Pinning or basting pieces before final sewing
Testing helps you see potential issues, adjust patterns or stitches, and avoid wasted fabric. It’s a small step that saves stress later and makes your sewing journey much more enjoyable.
Lesson 6: Patience Is More Important Than Speed
I once watched a friend rush through her first sewing project. She wanted to finish her tote bag in one evening, skipping pins and trying to cut too quickly. The result was uneven seams, misaligned handles, and a lot of frustration. I realized then that patience is a beginner’s secret weapon.
Sewing isn’t a race. Take your time to:
- Pin pieces carefully
- Check the pattern before cutting
- Sew slowly on tricky areas
Slowing down prevents mistakes and teaches you to notice details you might otherwise miss. Even if you feel excited to finish, remember that slow, deliberate sewing leads to better results and more confidence.
Lesson 7: Mistakes Are Part of the Process
I’ll be honest: I’ve sewn zippers backward, skipped a notch, and even cut a sleeve the wrong way. One of my favorite tips from a fellow beginner was simple but life-changing: “If you make a mistake, just rip it out and learn.” This is one of the things I wish I knew before I started sewing.
Making mistakes is not failing; it’s learning. Every seam you redo teaches you something new about fabric, tension, and patience. Keeping a seam ripper handy and viewing errors as lessons makes sewing far less intimidating.
Even small mistakes can lead to discoveries. For instance, misaligning a pattern piece once helped me understand grainlines better. Now I pay more attention and avoid the same errors in future projects.
Lesson 8: Labels and Organization Save Sanity
A beginner tip I picked from a sewing friend: “Label everything!” I didn’t do this at first, and my pieces got mixed up, especially when making a multi-piece blouse. I spent nearly 20 minutes trying to figure out which sleeve belonged to which front piece.
Labeling pattern pieces with numbers or letters, and storing them carefully, saves time and prevents confusion. You can use small sticky notes, paper clips, or even a pencil to write directly on the tissue paper (lightly!).
Being organized also applies to your fabric, tools, and thread. Having everything in order makes the whole sewing experience smoother and more enjoyable.
Lesson 9: Reading Instructions Is a Skill
I once skipped reading the instructions on a beginner dress and thought I could “figure it out.” Big mistake. I ended up sewing the front panel upside down and had to start over.
Reading instructions is a skill, not a chore. This is one of the things I wish I knew before I started sewing. Take your time to:
- Read the full sheet before starting
- Notice numbered steps and how they reference pattern pieces
- Look at illustrations carefully
Think of instructions like a map. They tell you where to go next and prevent getting lost. If you want extra help, our guide on how to read a sewing pattern breaks down patterns step by step for beginners.
Lesson 10: Seam Allowance Is Not Optional
A tip I learned from another beginner’s experience: “I didn’t add seam allowance, and my skirt turned out too small.” That moment taught me that seam allowance matters more than most beginners realize.
Seam allowance is the space between your stitching line and the edge of the fabric. Some patterns include it, some don’t. Check your instructions carefully.
Not adding it correctly can make a finished garment too tight or uneven. Practicing on scrap fabric first can help you get used to measuring seam allowance accurately. Once it becomes second nature, your garments will fit better and look more polished.
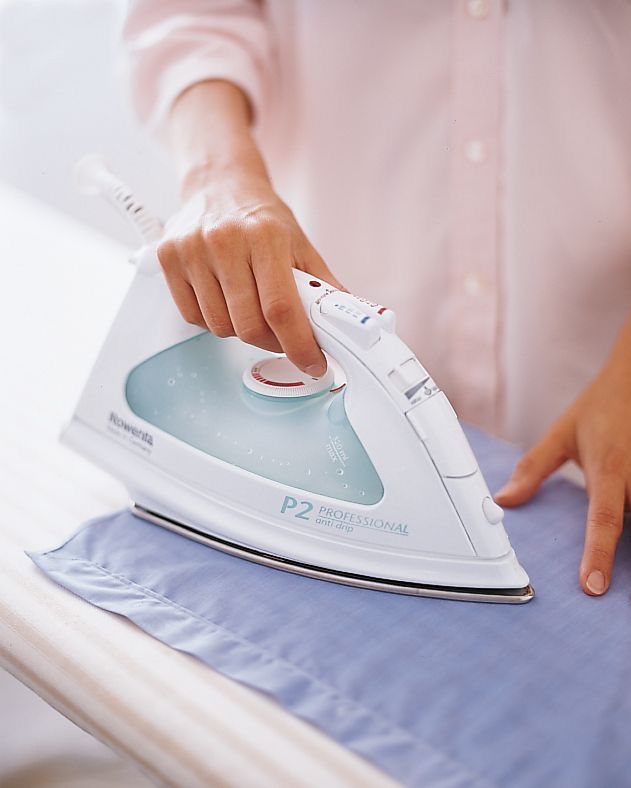
Lesson 11: Pressing Is as Important as Sewing
When I first started, I thought ironing was just a final touch. One weekend, I spent hours sewing a blouse only to notice that the seams looked bulky and uneven. A friend pointed out: “Have you been pressing as you go?” That moment changed everything.
Pressing your seams with an iron during the sewing process keeps your fabric flat and your stitches crisp. Even a simple straight seam looks cleaner if pressed correctly. Use the iron after each major step; before sewing darts, after joining panels, and before hemming. This small habit makes a huge difference in the final look of your project.
Lesson 12: Not Every Project Needs Fancy Tools
I once bought an expensive stitch guide, a fabric cutter, and a high-tech sewing foot for my first quilt. I wanted to feel “professional,” but honestly, I barely used half of it. A fellow beginner told me: “Start simple, and only buy what you really need.”
You don’t need all the fancy gadgets to start sewing. Basic tools like scissors, pins, thread, and needles will get you through most beginner projects. Only invest in specialty tools when you understand the need, like a zipper foot for a bag or an overlocker for knits. This prevents feeling overwhelmed and keeps sewing fun.
Lesson 13: Test Stitches and Tension First
I remember trying to sew a stretchy jersey fabric for the first time. I assumed my machine settings were fine, but halfway through, the fabric puckered and the seams looked wavy. A friend who had been sewing for years shared a simple trick: “Always test your stitches on scrap fabric first.”
Testing on scraps helps you adjust stitch length, thread tension, and even the needle type for your fabric. It’s a small step that can prevent a ruined project. Even experienced sewers do this. It’s not just for beginners!
Lesson 14: Keep a Sewing Journal
This might sound unusual, but one of the most helpful tips I ever “borrowed” from another beginner was keeping a sewing journal. At first, I didn’t see the point. But after a few projects, I realized I kept forgetting what worked and what didn’t.
A sewing journal can include:
- Pattern notes and adjustments
- Fabric types and quantities
- What stitches or techniques worked best
- Mistakes and solutions
It’s amazing how much time you save when you can reference past projects. For example, you’ll remember that a particular brand of cotton shrinks slightly, or that your machine prefers a longer stitch for thick fabrics.
Lesson 15: Enjoy the Process, Not Just the Result
I used to stress about finishing projects quickly or making them perfect. One day, a friend told me: “Sewing isn’t about perfection. It’s about creating and learning.” That changed my perspective completely.
Yes, a polished final garment feels amazing. But the real joy comes from experimenting with fabrics, patterns, and stitches. Celebrate small wins, like mastering a new seam, finishing a sleeve, or successfully following a tricky pattern. Each project builds your skills and confidence, even if it’s not flawless.
Remember, every experienced sewer started as a beginner, made mistakes, and learned along the way. By embracing the process, you turn sewing from a stressful chore into a rewarding hobby.
Final Thoughts
Looking back, if I had known these 15 lessons before I started sewing, I would have saved so much time, frustration, and wasted fabric. But even mistakes became stepping stones that helped me improve.
From understanding patterns, measuring accurately, and choosing the right fabric, to testing stitches, pressing seams, and keeping a journal. These tips cover both the practical and mental sides of sewing. They make beginners feel capable, reduce stress, and make the sewing process enjoyable.
Sewing is a journey. Each project teaches you something new, whether it’s how to follow a pattern, sew a perfect seam, or solve an unexpected problem. Take your time, enjoy the process, and don’t fear mistakes because they’re actually your best teachers.
If you want extra guidance as you practice these lessons, you can check out our post 10 Beginner Hand Stitch Techniques, to master basic stitches.
With these tips and a little practice, the “things I wish I knew” won’t feel like missed opportunities. They’ll become the foundation of your sewing success.