Crochet Leaf Deco Tutorial: How to Make Cute Decorative Crochet Leaves (Beginner Friendly)
Crochet leaves are one of those small projects that deliver a big impact. They’re simple, versatile, and endlessly useful, whether you’re decorating your home, adding handmade charm to accessories, or just practicing new stitches in a fun way. In this tutorial, we’ll walk through how to crochet a cute leaf decoration step by step, using a mix of familiar stitches and a few exciting new ones.
One of the best things about this crochet leaf deco project is how approachable it is. Even though the finished leaf looks detailed and elegant, the process is very beginner-friendly. You’ll use stitches you may already know like chain stitch, single crochet, double crochet, and slip stitch while also learning half double crochet and treble crochet in a low-pressure, practical way. These stitch combinations help shape the leaf naturally, giving it a realistic curve and texture.
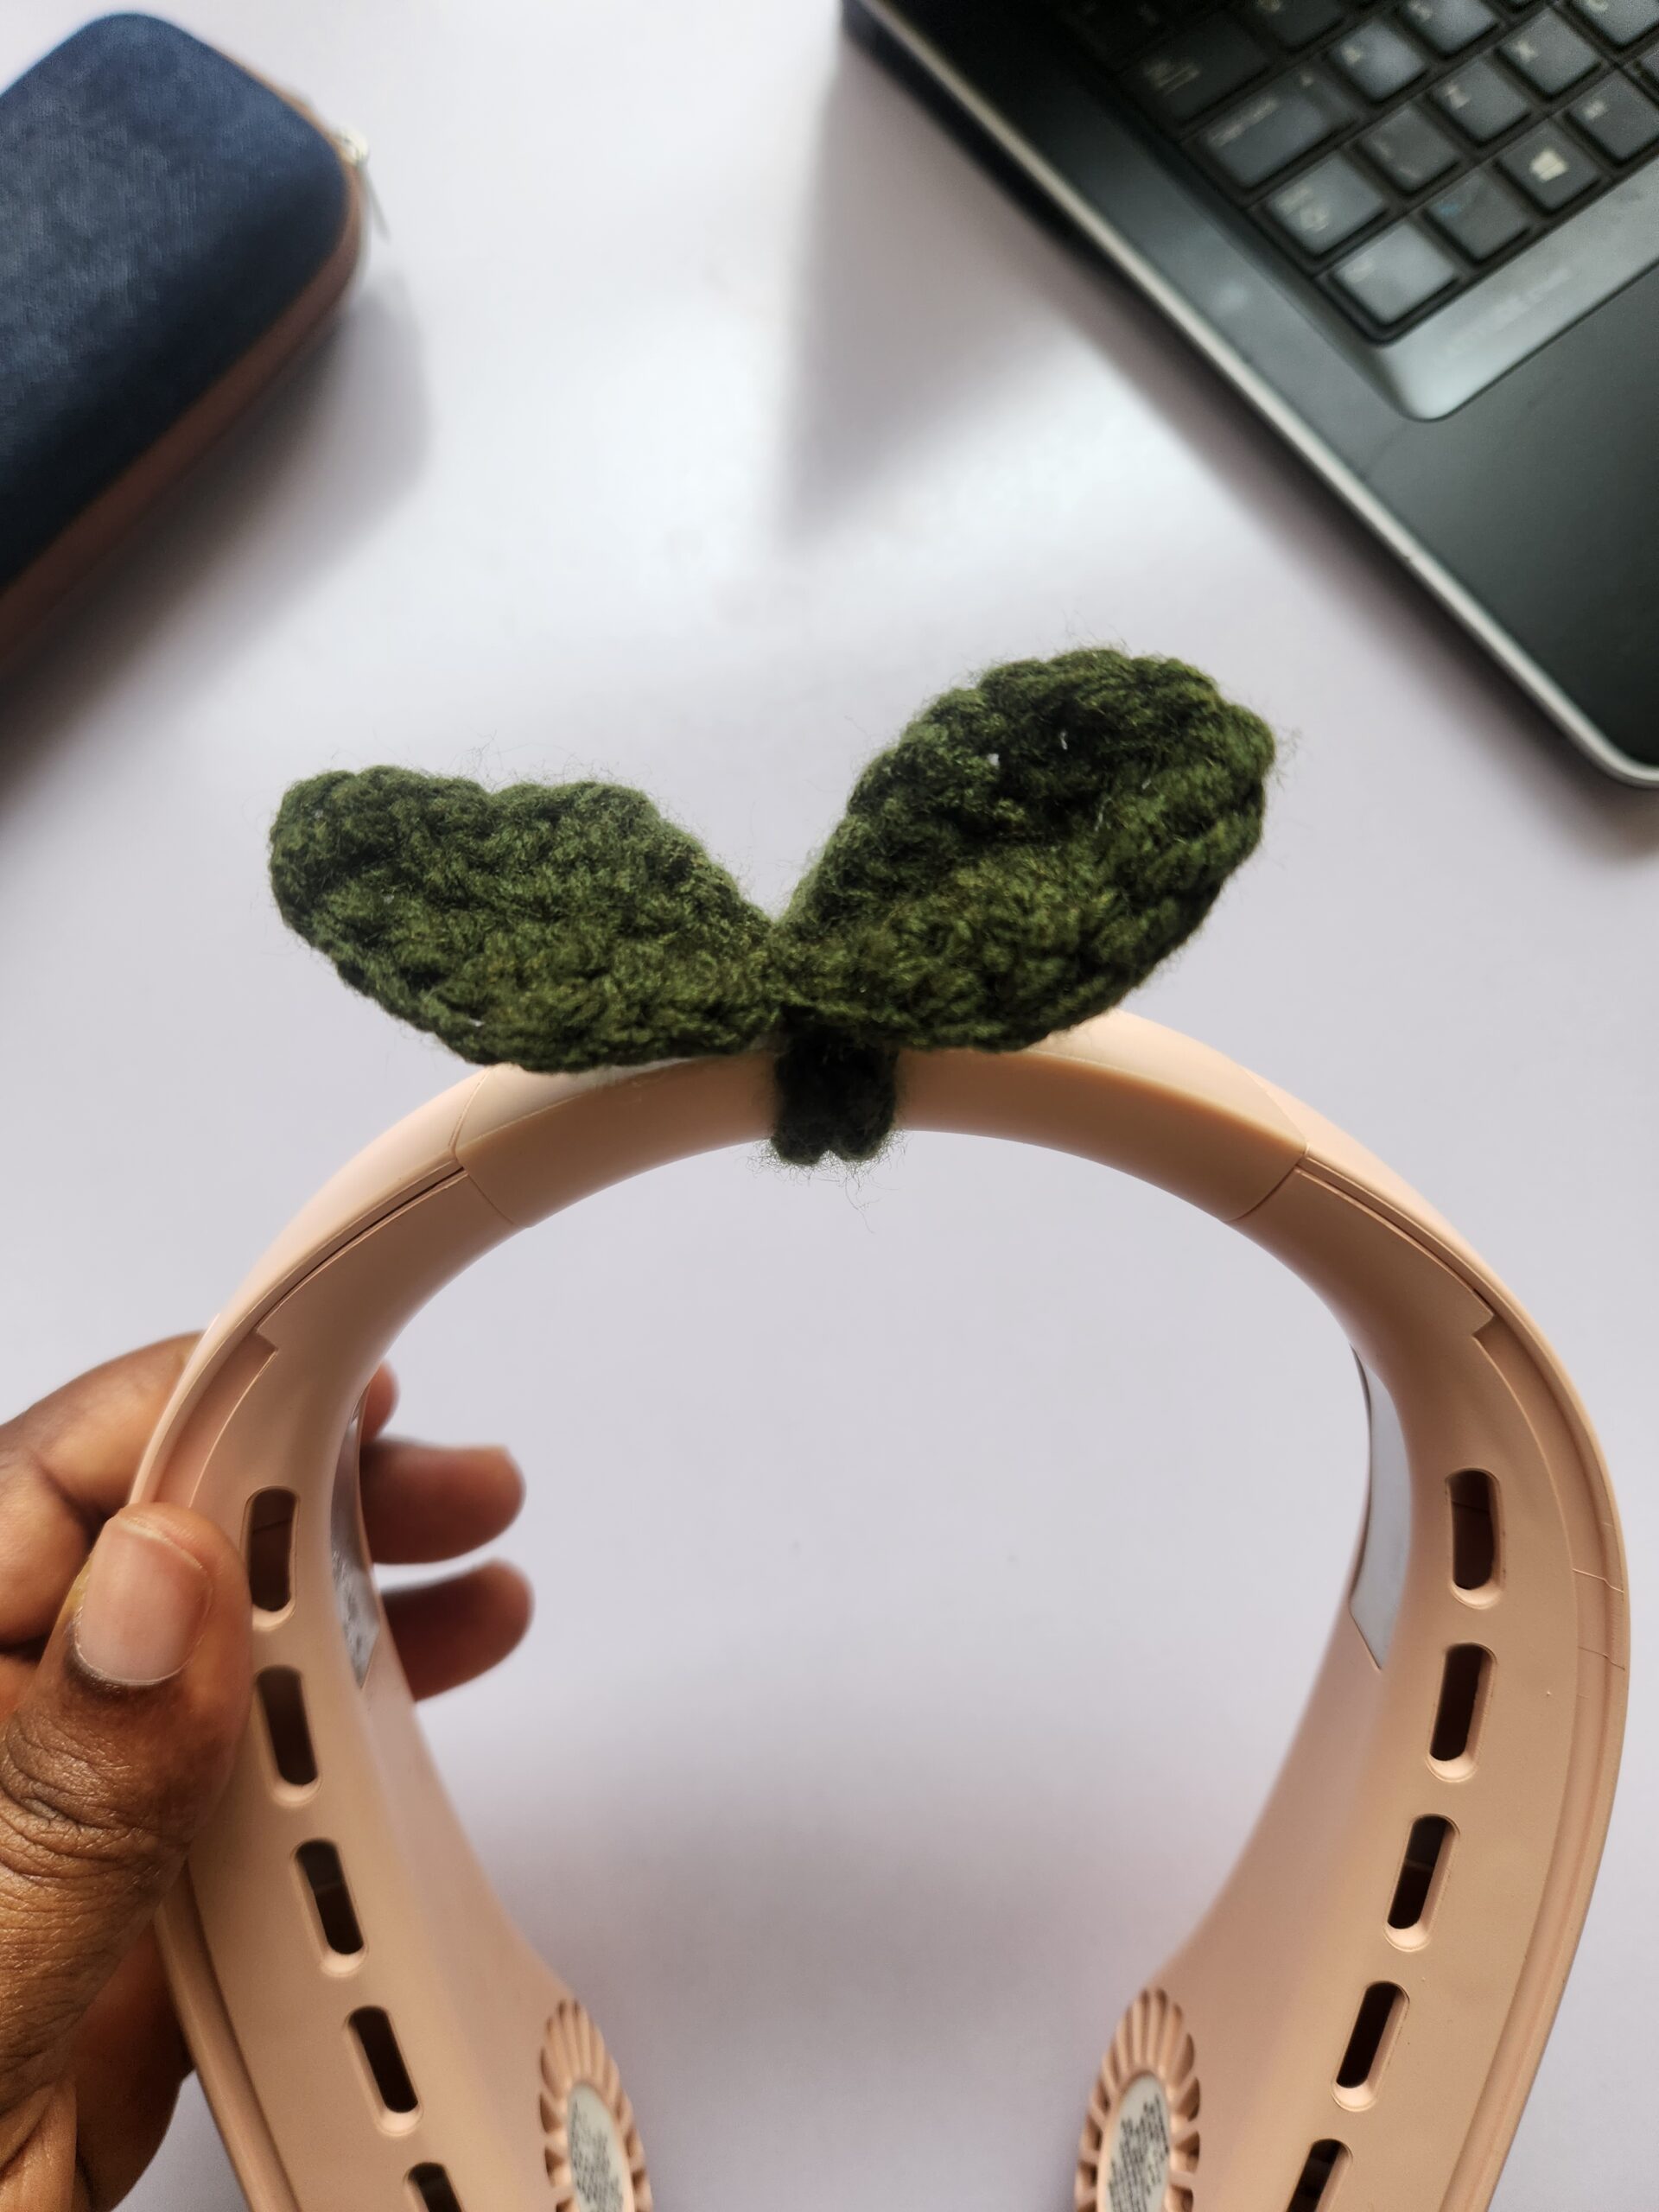
Whether you’re looking to decorate earbuds, wrap cables, embellish gift wrapping, or simply add handmade décor to your space, this crochet leaf is a perfect choice. It’s quick to make, requires minimal yarn, and offers excellent stitch practice. Let’s jump in and start crocheting.
What You’ll Need for This Crochet Leaf Project
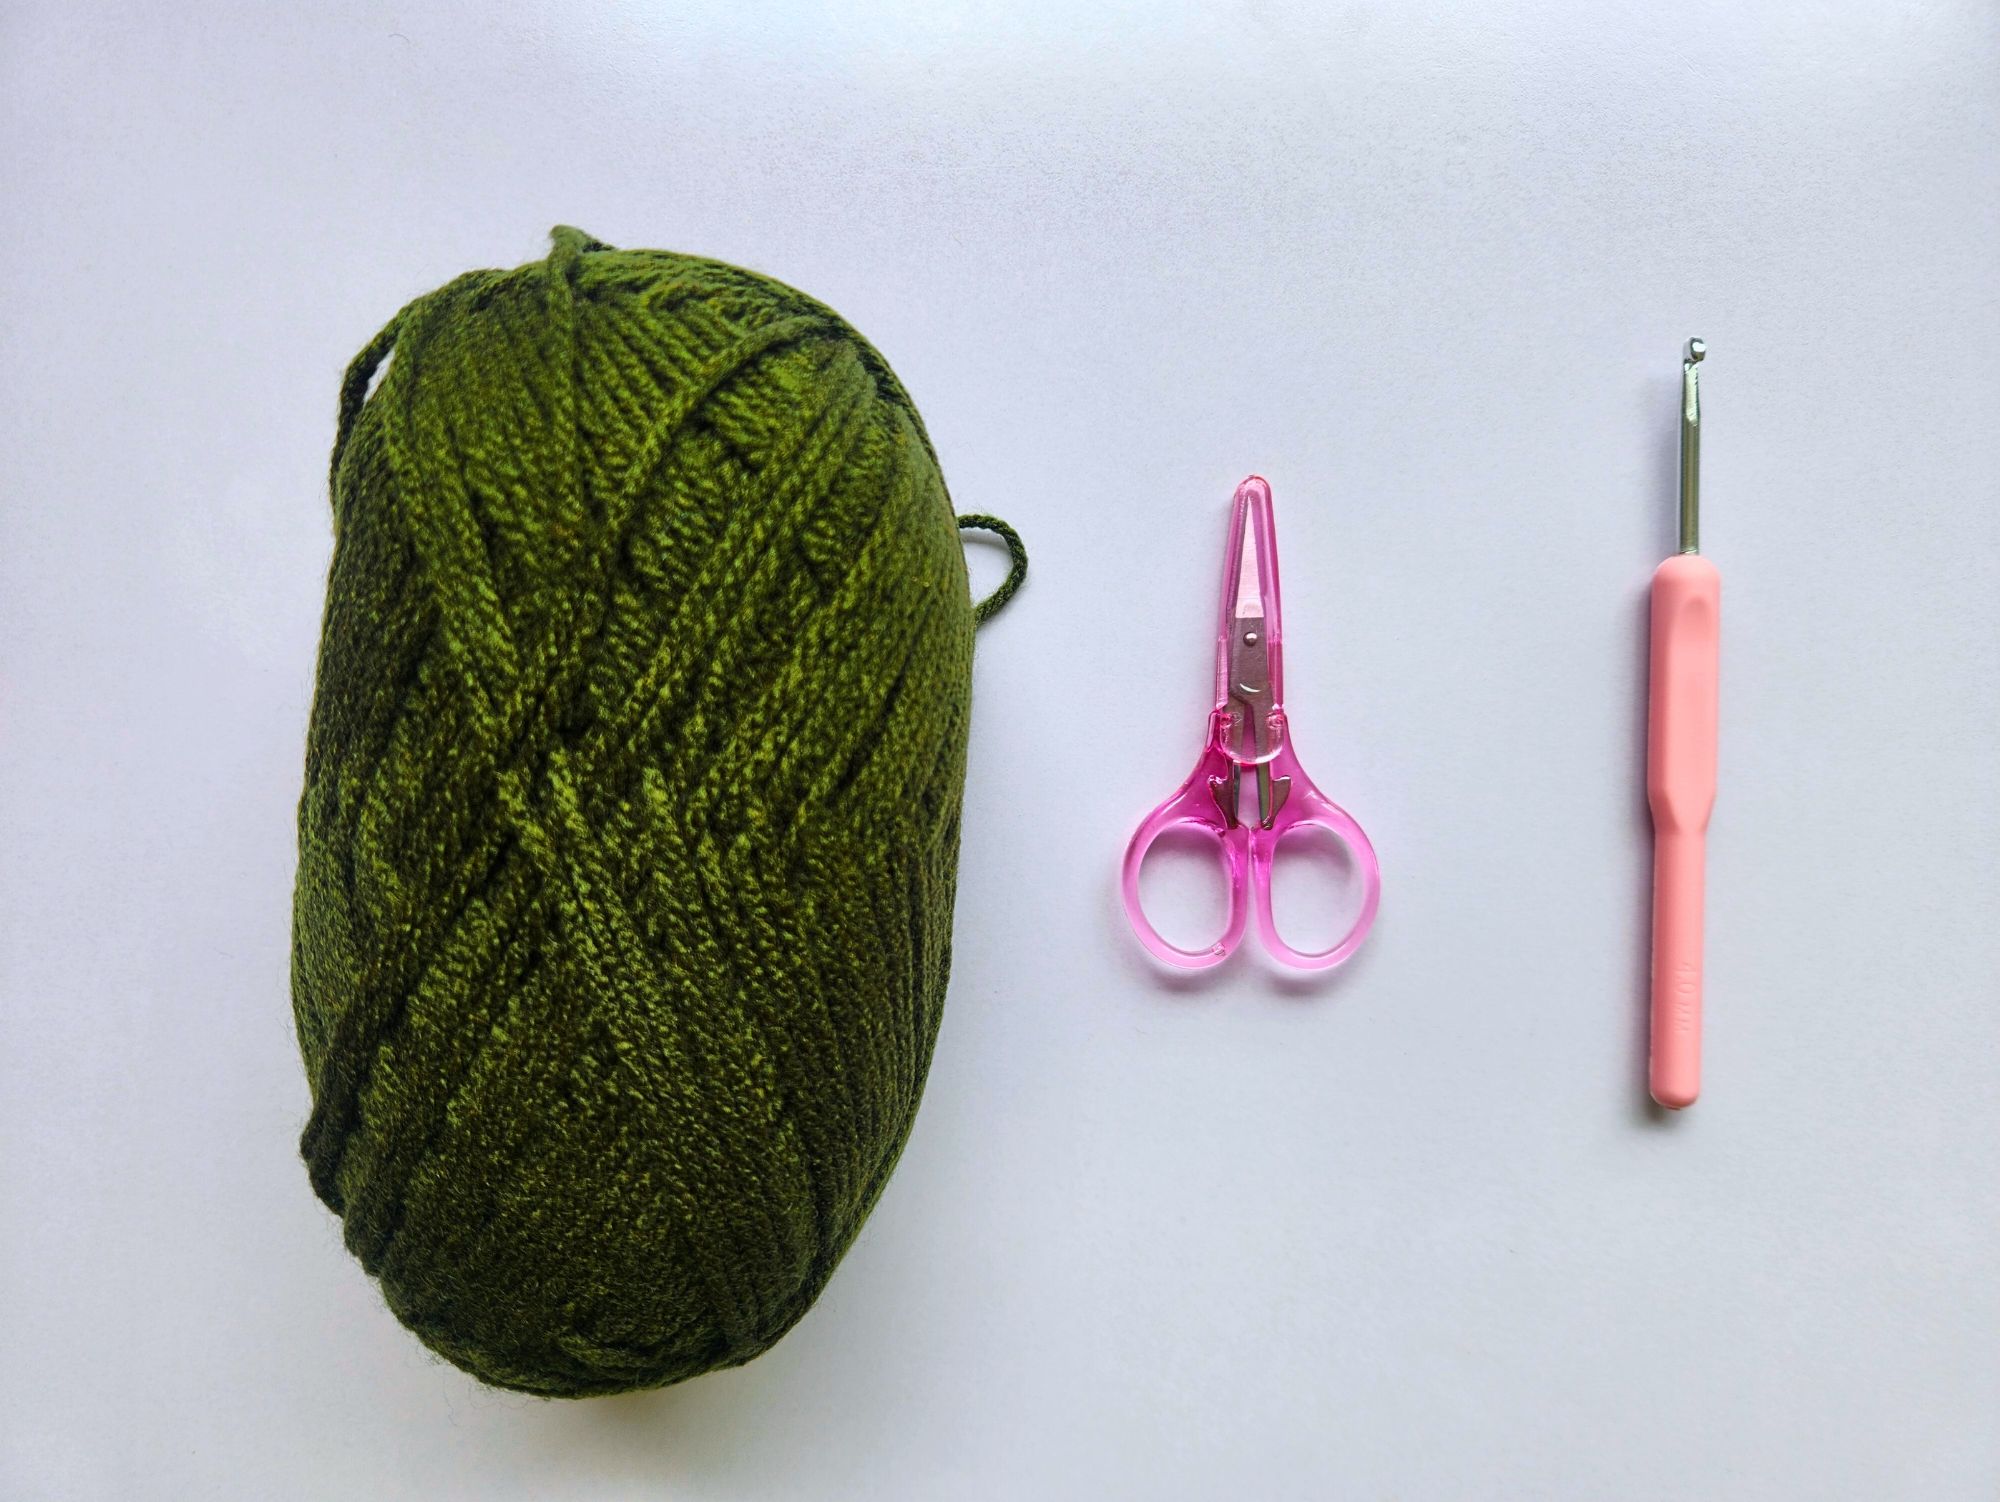
Before you begin, gather the following materials:
- Yarn (any weight works, but light or medium weight yarn shows stitch detail best)
- Crochet hook suitable for your yarn
- Scissors
- Yarn needle (for weaving in ends)
You can use solid green yarn for a classic leaf look, or experiment with autumn colors, variegated yarns, or even cotton yarn for a crisp finish.
Crochet Stitches Used in This Leaf Deco
This project is perfect for stitch practice. You’ll use:
- Chain stitch
- Single crochet
- Half double crochet
- Double crochet
- Treble crochet
- Slip stitch
If you already know chain, single crochet, and double crochet, you’re in great shape. The half double crochet and treble crochet are easy additions that add height and texture to the leaf.
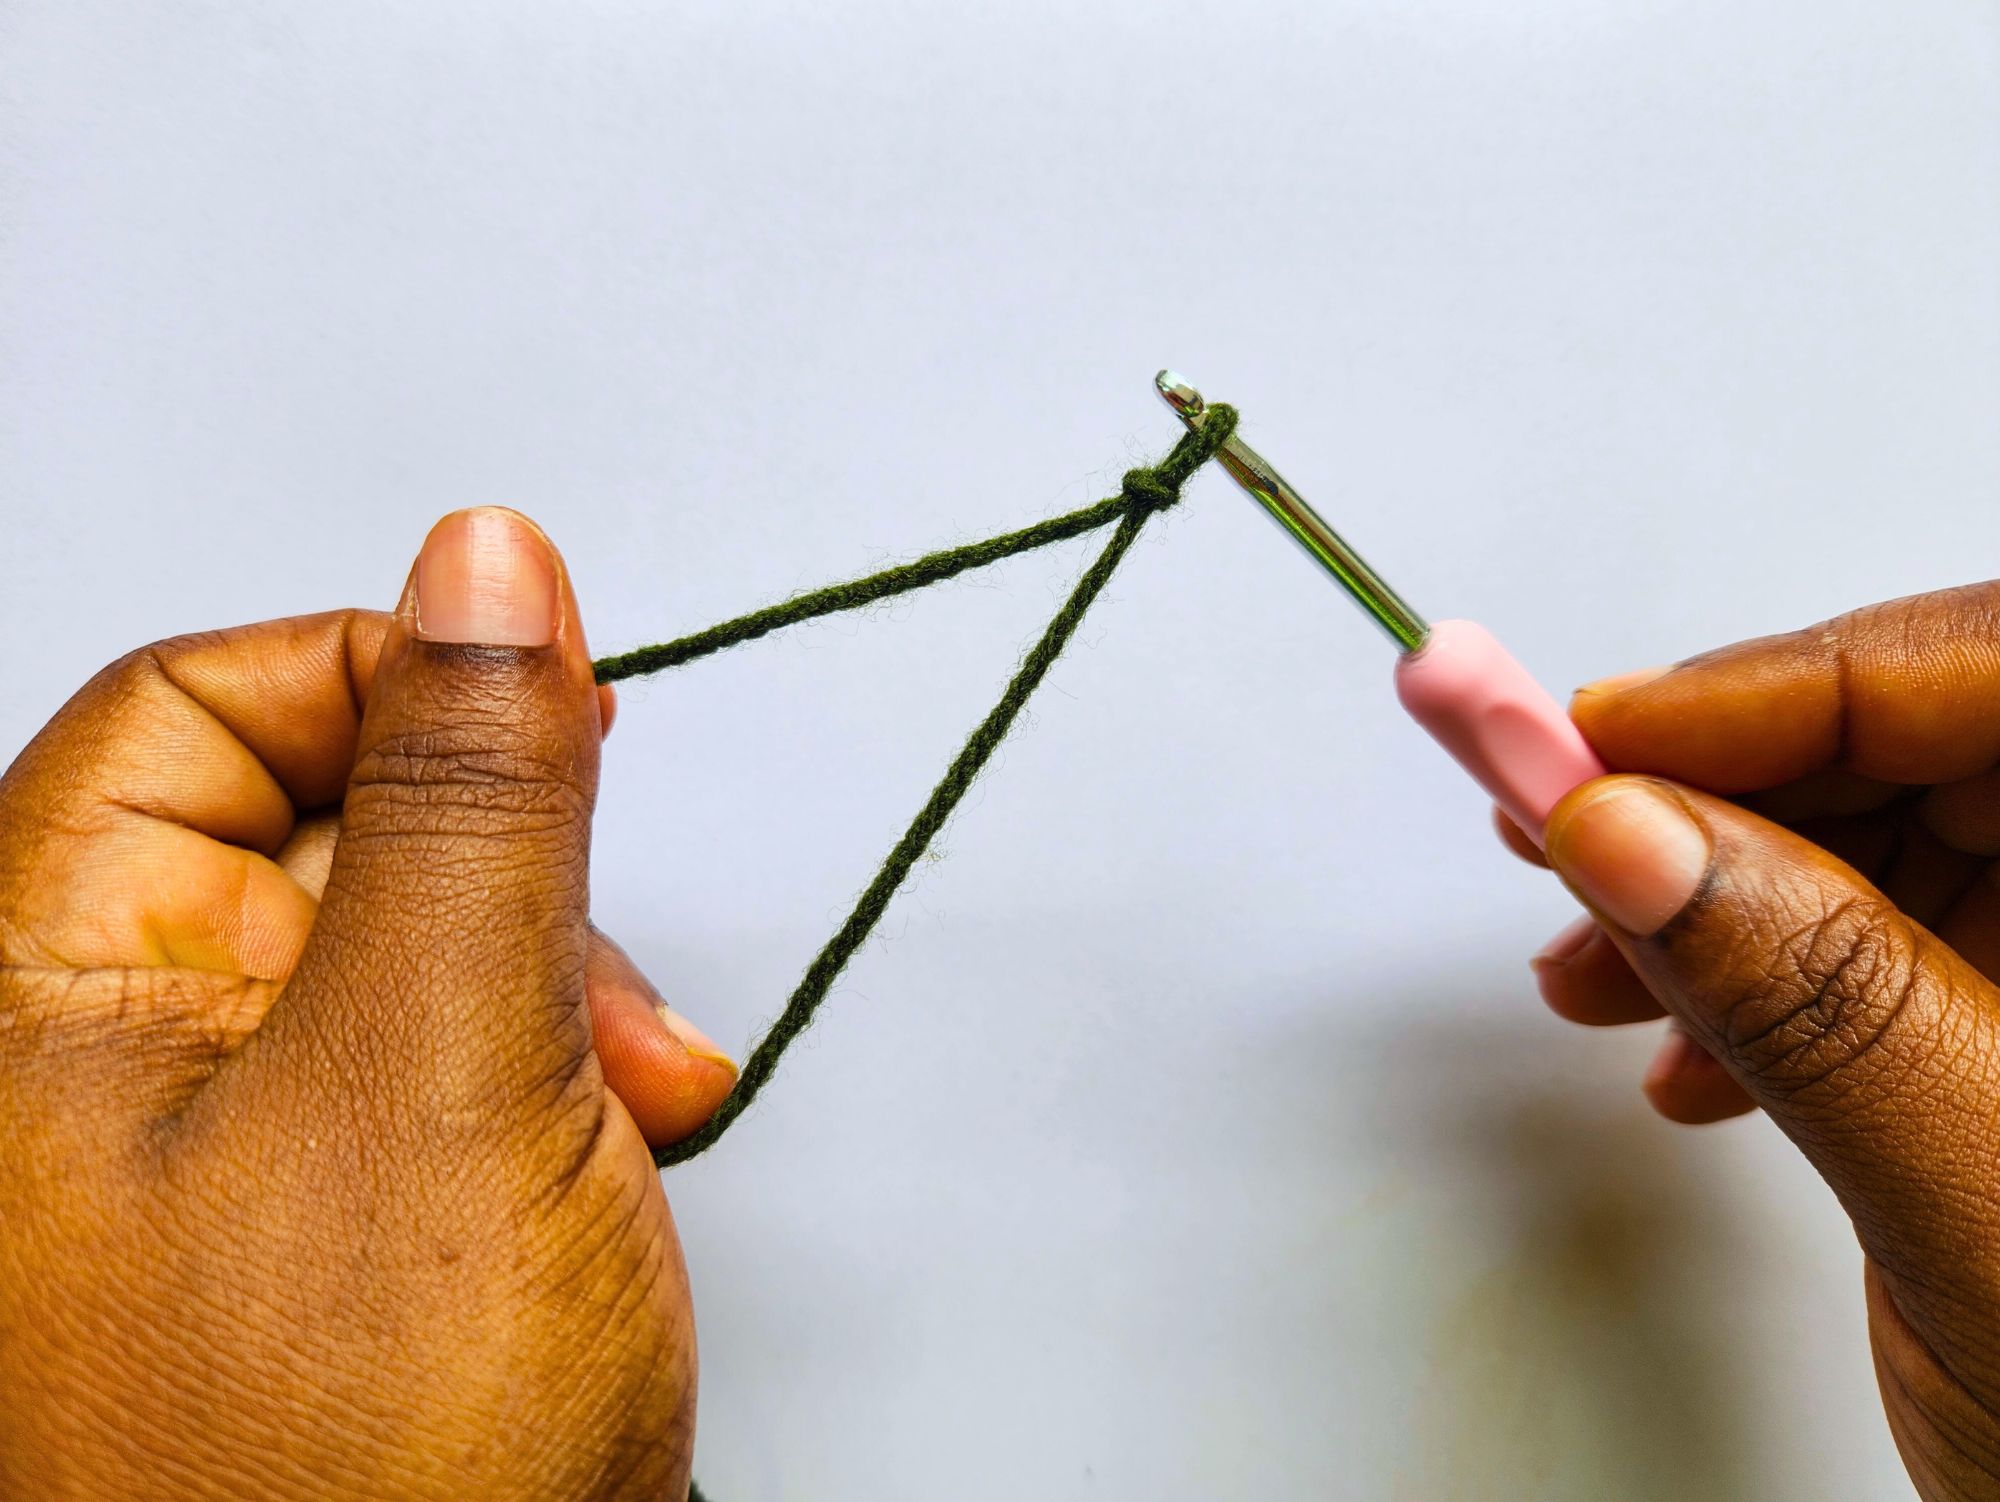
Step 1: Create the Foundation Chain
Start by holding the yarn correctly in your left hand and forming a slip knot on your hook.
- Crochet 16 chain stitches.
- Count carefully to ensure accuracy, as this chain forms the backbone of your leaf.
Once complete, you’ll have a flexible base that allows the leaf to curve naturally as stitches increase and decrease in height.
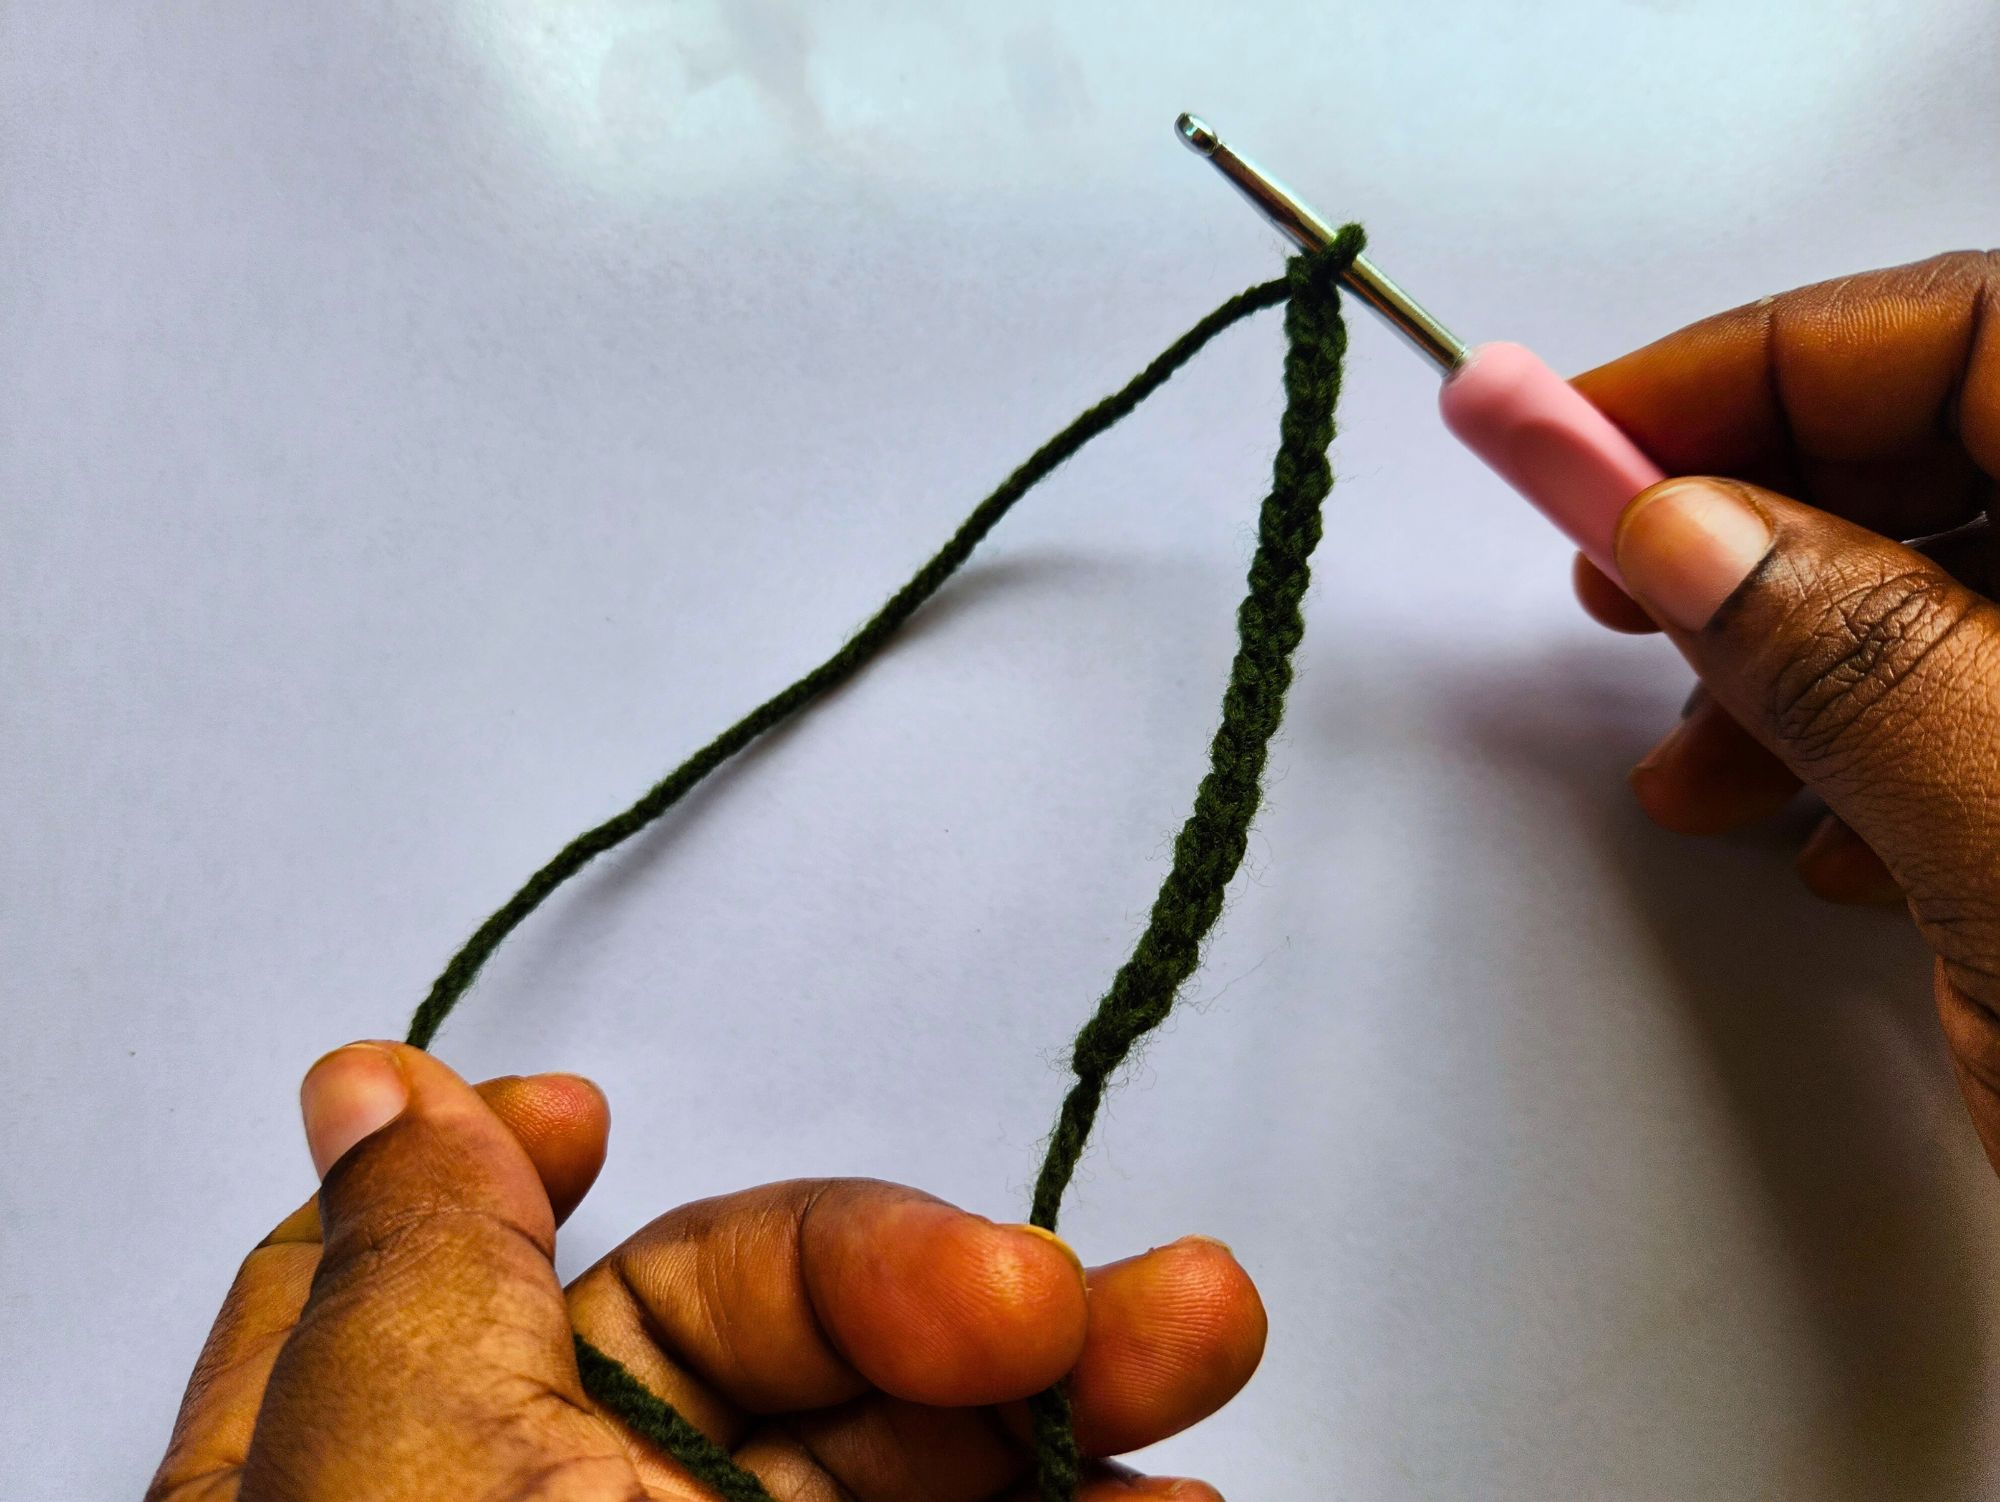
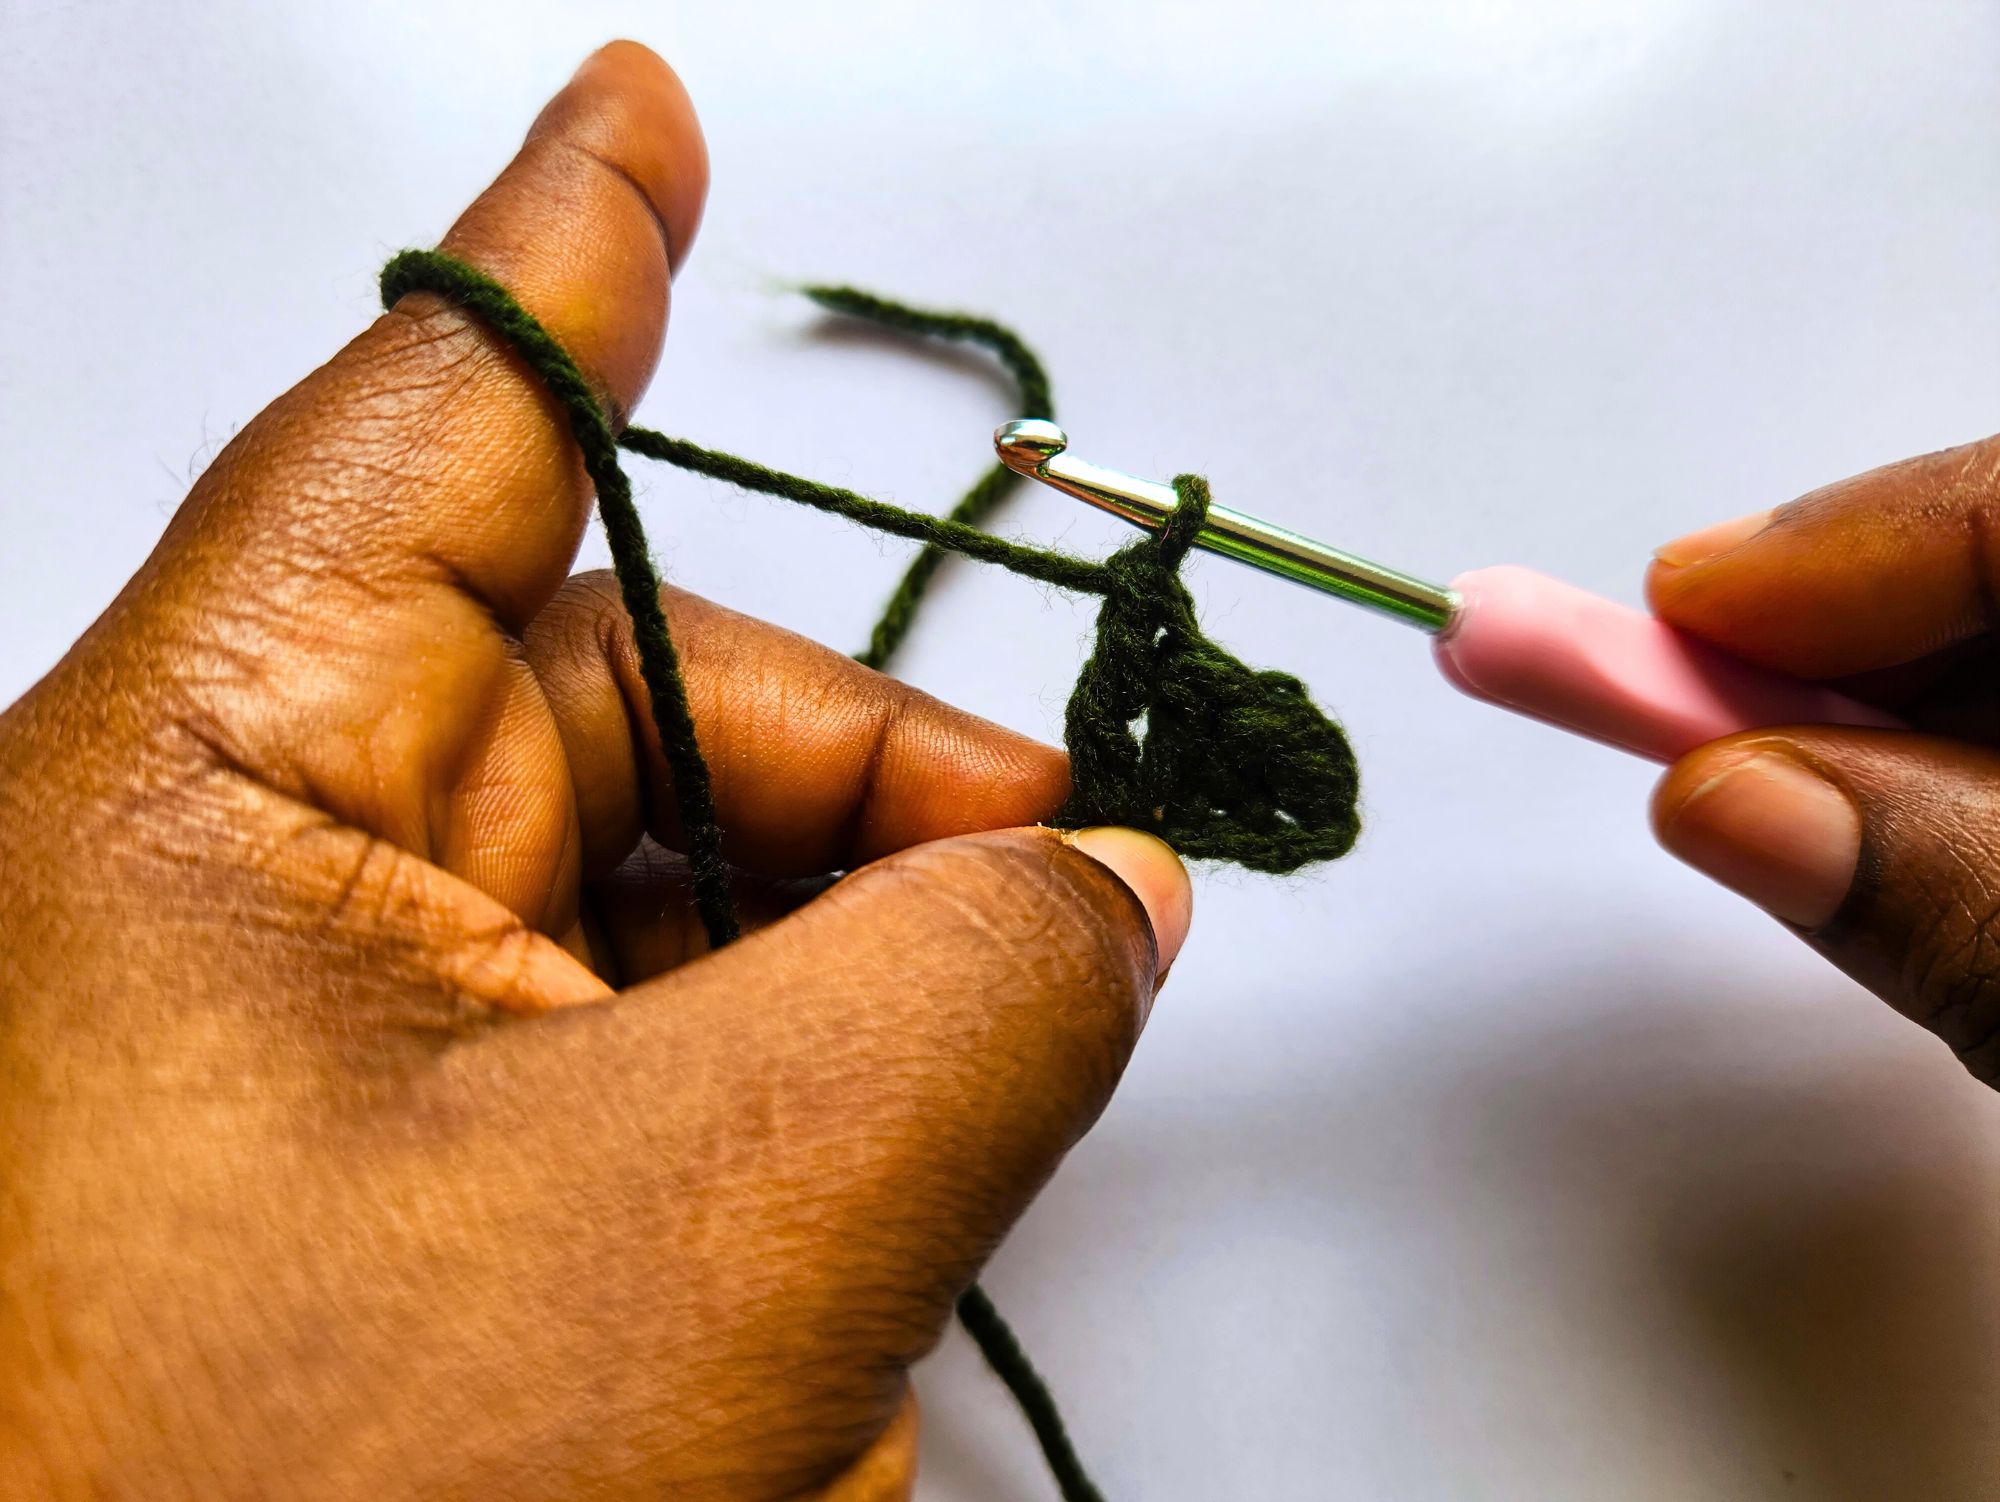
Step 2: Begin Shaping the First Side of the Leaf
Insert your hook into the second chain from the hook, working under just one strand of the chain.
- Single Crochet:
Yarn over, pull through the chain (two loops on hook), yarn over again, pull through both loops. - Half Double Crochet:
Yarn over once, insert into the next chain, yarn over and pull up a loop (three loops on hook). Yarn over and pull through all three loops at once.
This stitch is shorter than a double crochet but taller than a single crochet, making it perfect for gradual shaping.
- Double Crochet :
Yarn over once, insert into the next chain, yarn over and pull through. Yarn over, pull through two loops, yarn over again, pull through the remaining two loops. - Treble Crochet:
Yarn over twice, insert into the next chain, yarn over and pull through (four loops on hook). Yarn over and pull through two loops three times until one loop remains.
You’ll notice the stitches gradually increase in height. This creates the smooth curve from the tip of the leaf to its widest point.
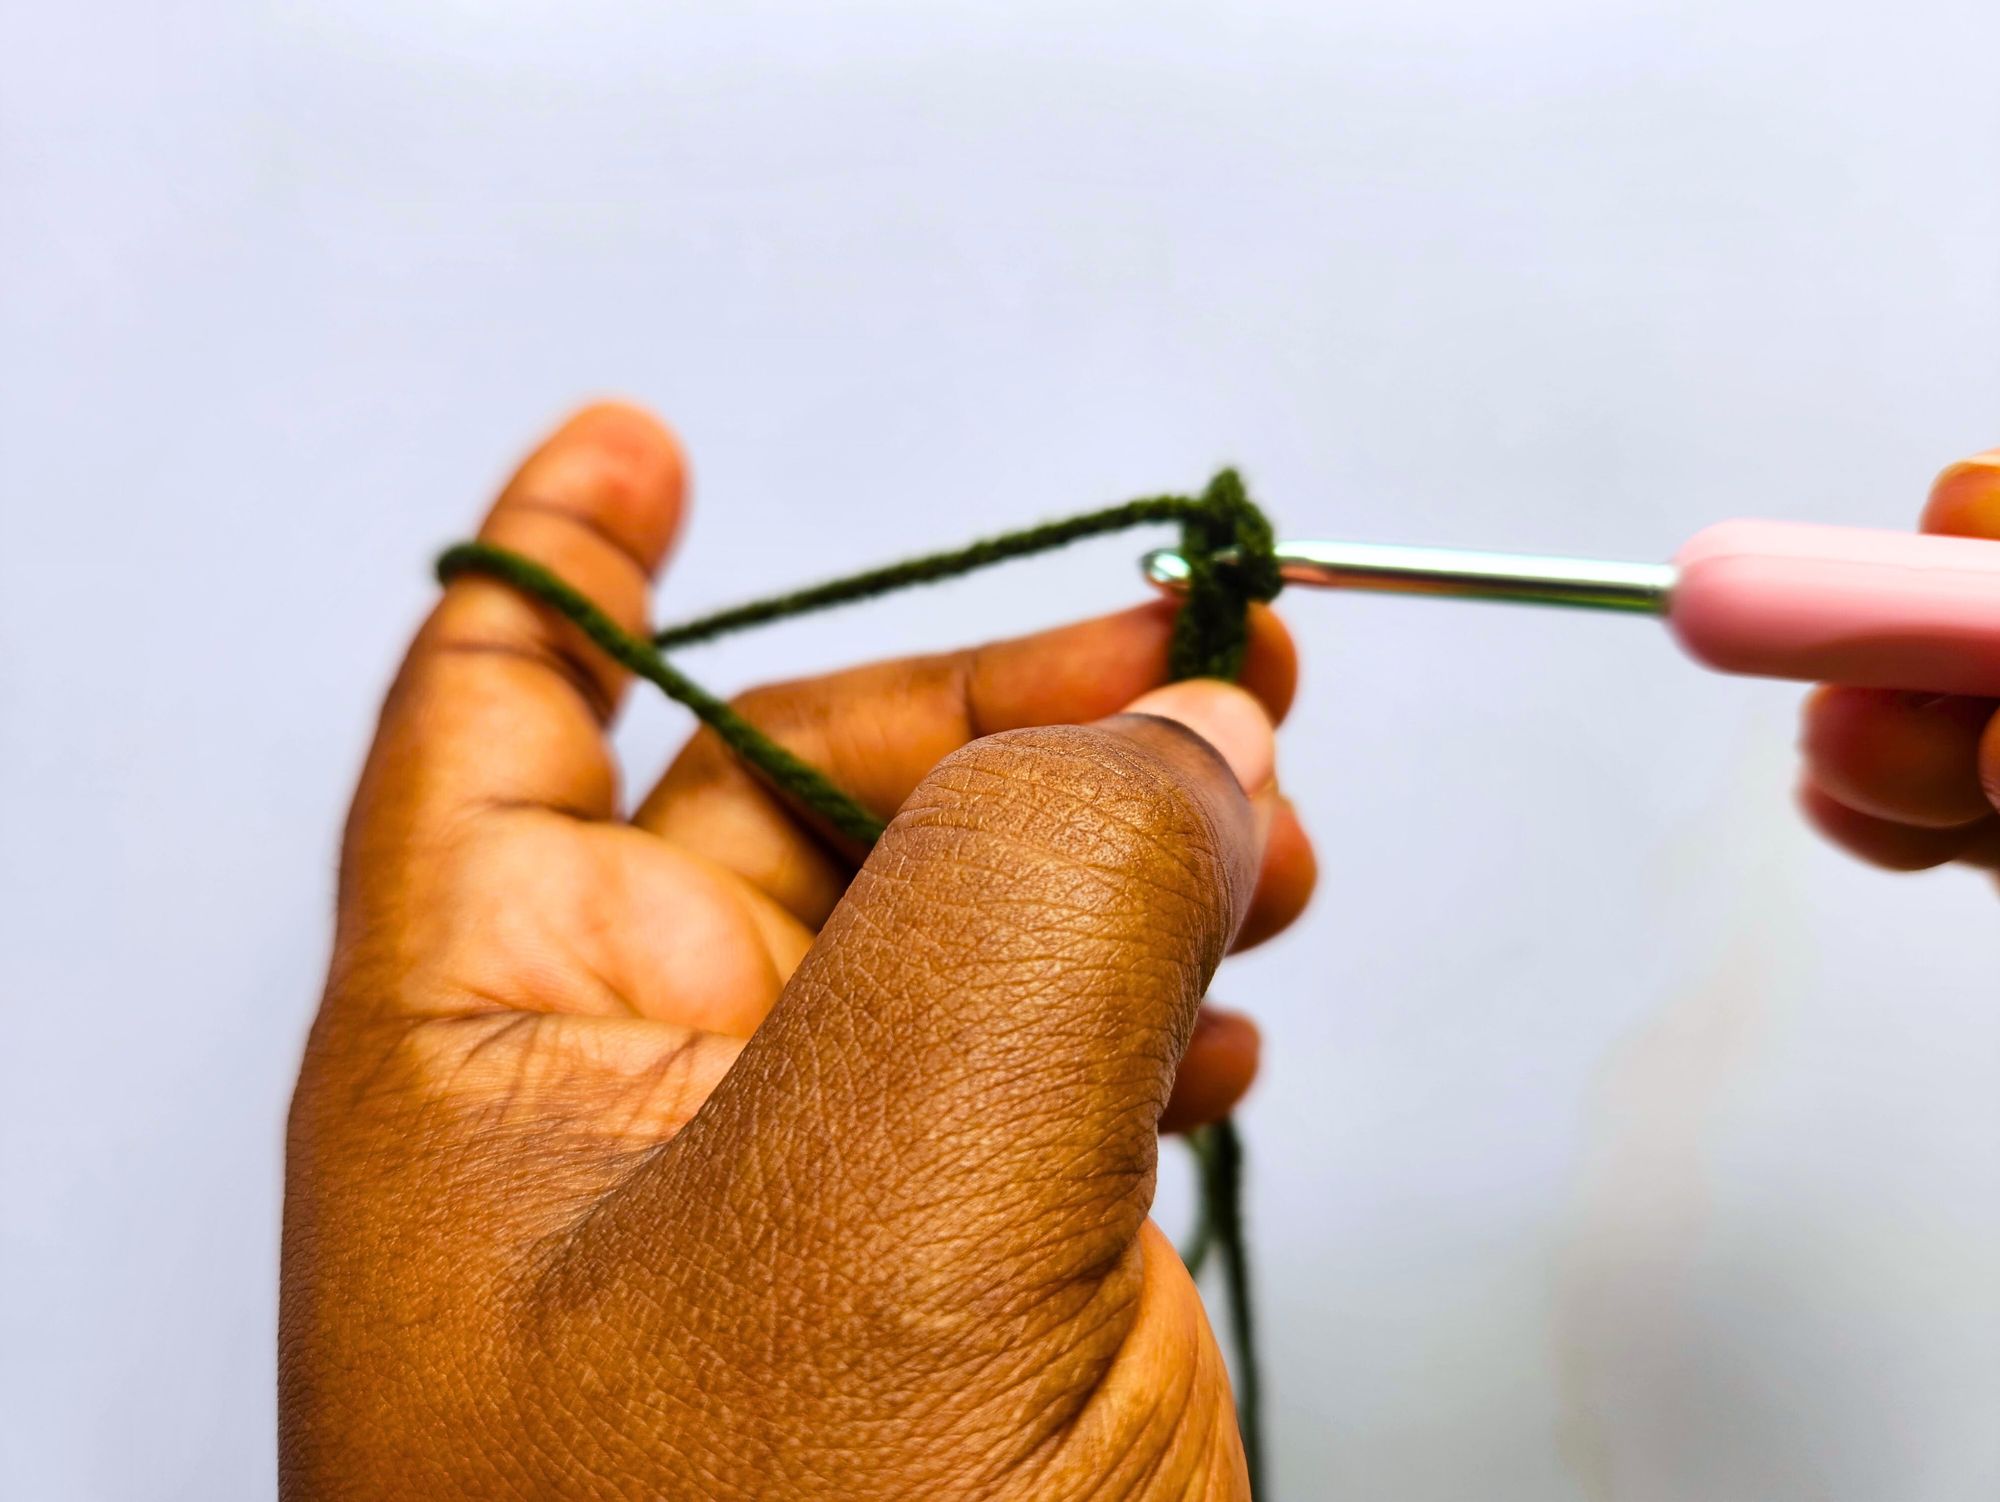
Step 3: Mirror the Shape to Narrow the Leaf
To form the other side of the leaf curve, we now reverse the stitch heights:
- Make one double crochet
- Follow with one half double crochet
- Then one single crochet
Finish this section with a slip stitch at the end. This completes the first half of the leaf shape.
Step 4: Repeat the Leaf Pattern for Balance
Now repeat the same stitch sequence once more to reinforce the shape:
- Single crochet
- Half double crochet
- Double crochet
- Treble crochet
Then decrease again:
- Half double crochet
- Single crochet
At this point, you’ve created one side of the leaf and half of the opposite side.
Step 5: Work Along the Other Side of the Foundation Chain
Rotate your work so you can crochet into the unused loops of the original chain.
Mirror the exact stitch order used previously:
- Single crochet into the same stitch as before
- Half double crochet
- Double crochet
- Treble crochet
This mirroring keeps the leaf symmetrical and balanced.
To decrease the width again:
- Double crochet
- Half double crochet
- Single crochet
Finish with a slip stitch into the corresponding joining point from the first side.
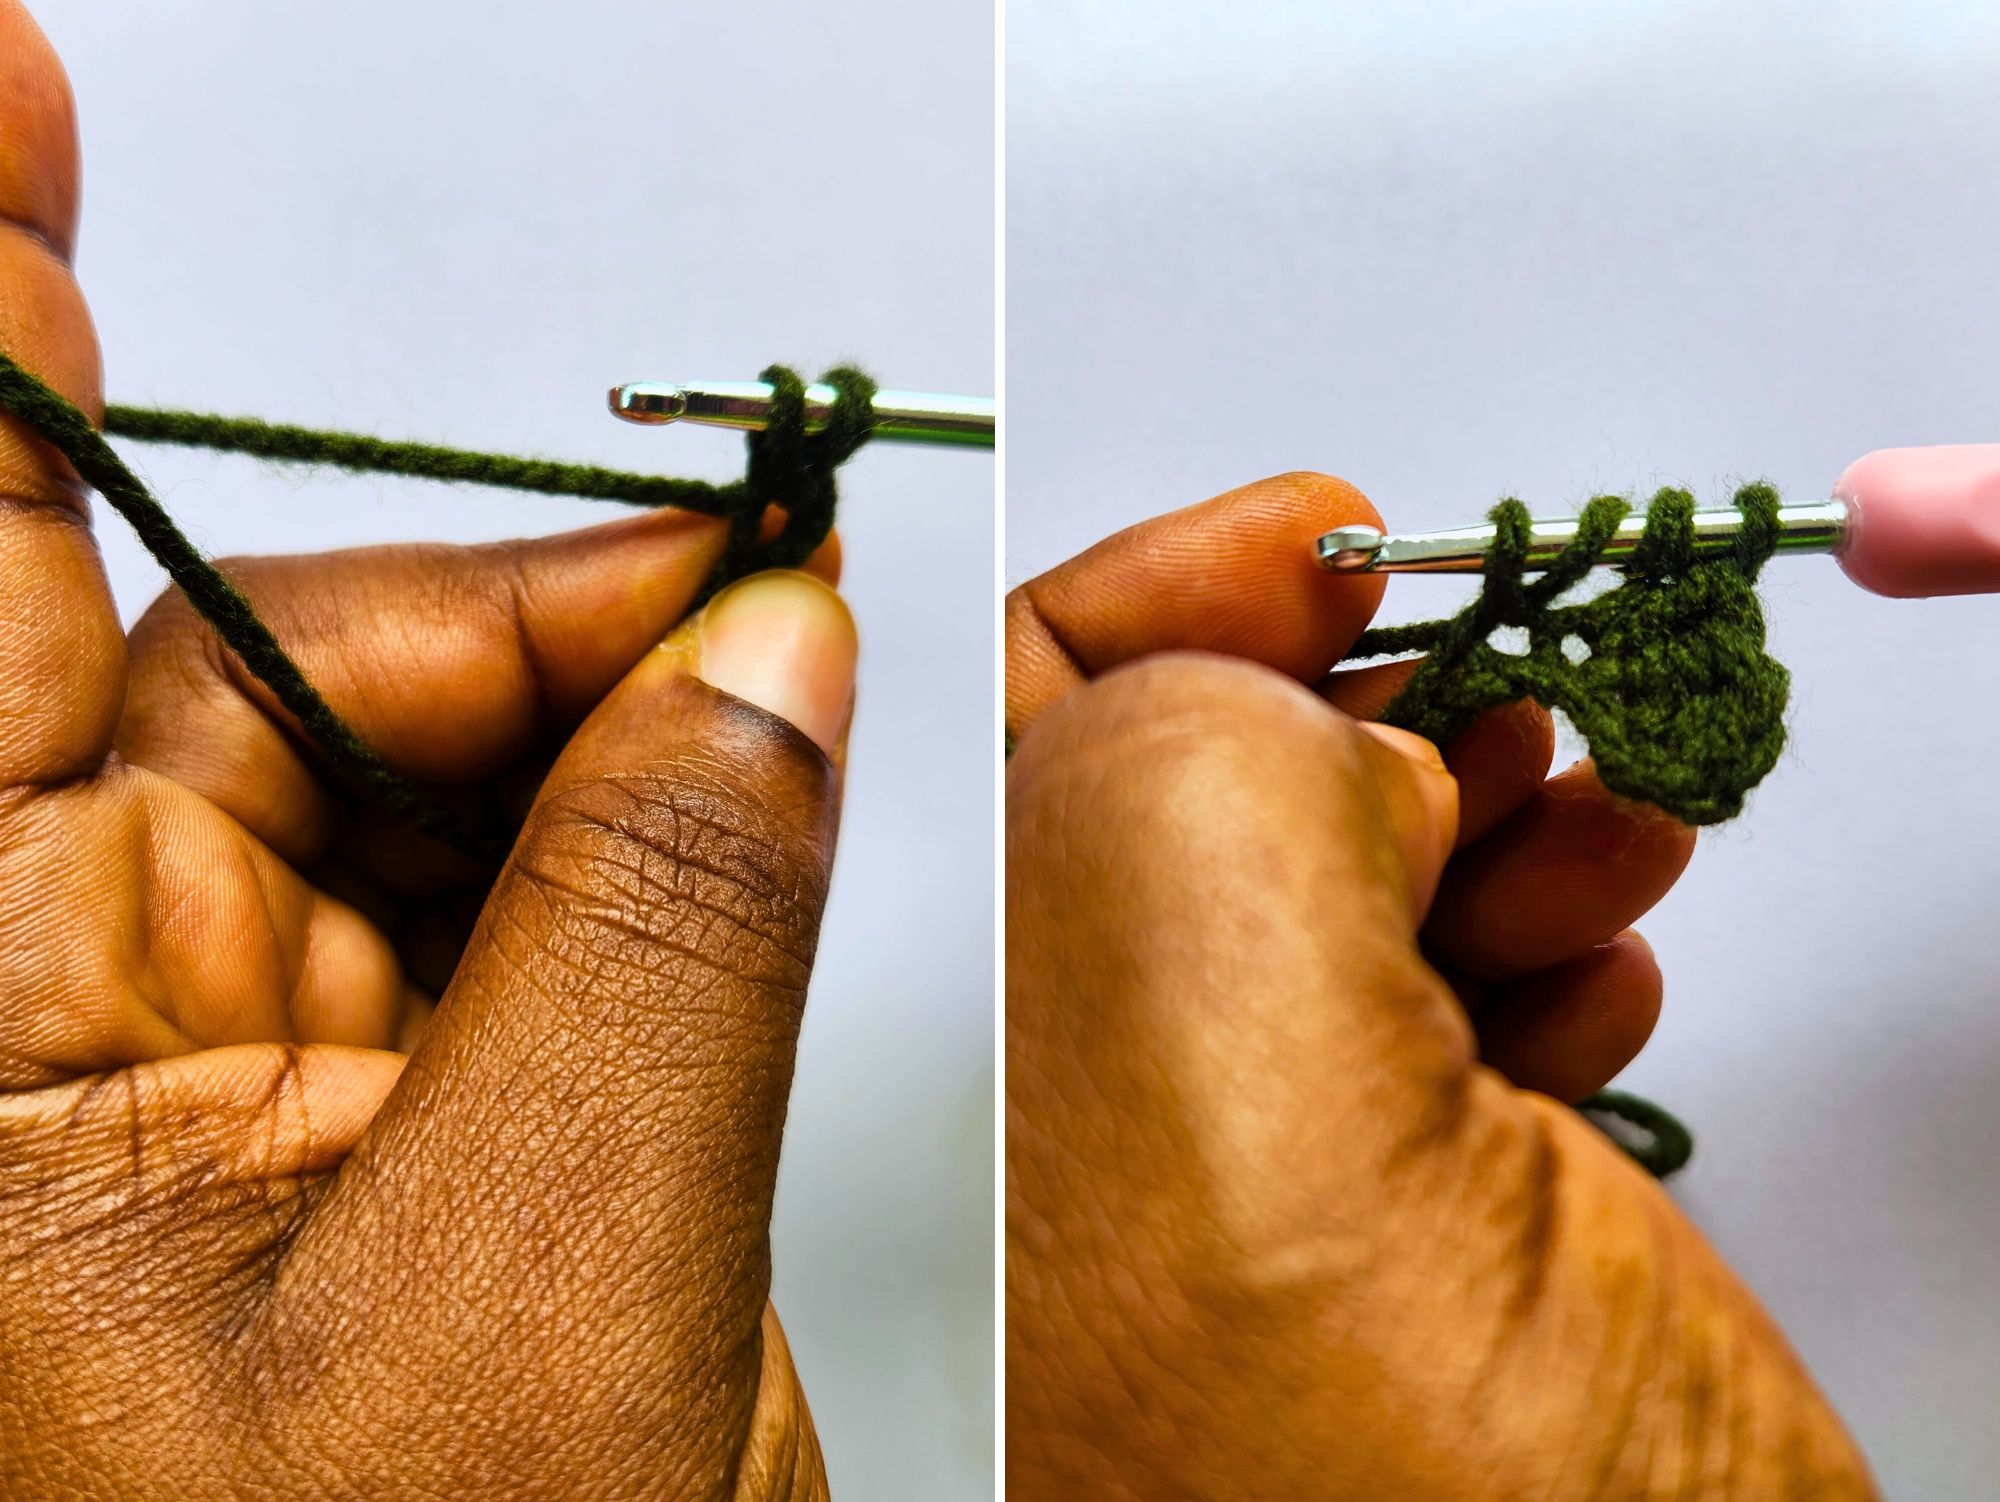
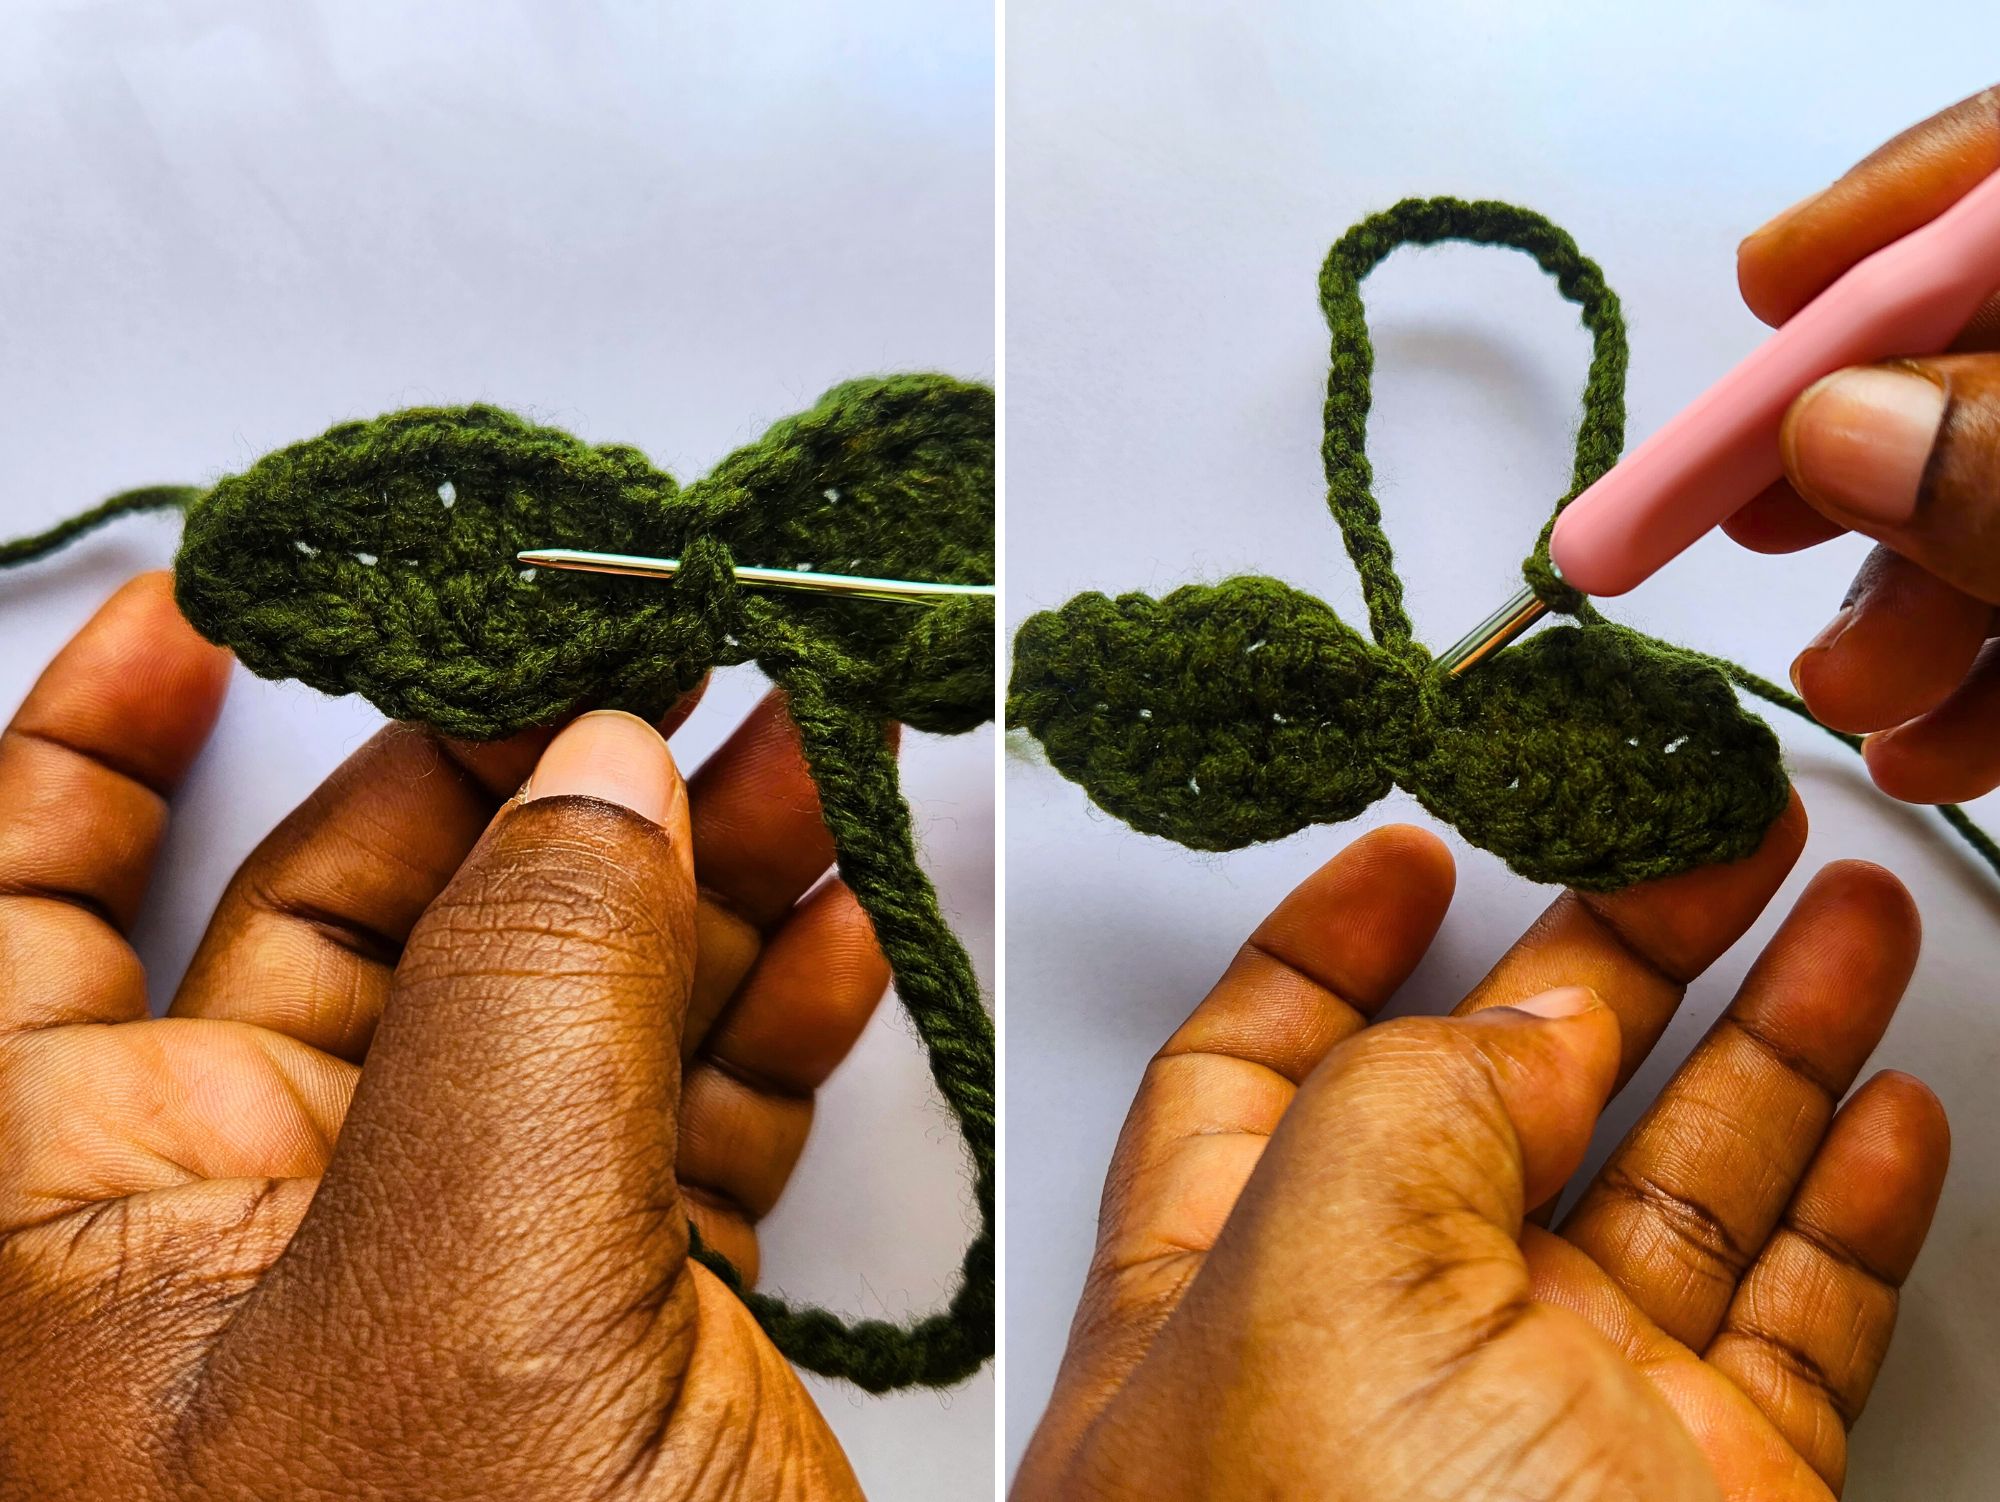
Step 6: Joining Both Sides of the Leaf
Every crochet stitch forms a small V shape at the top. To join the two sides neatly:
- Look for the very first V created by your initial single crochet on the opposite side.
- Insert your hook just below that V and make a slip stitch.
Continue slip stitching through each corresponding stitch, moving upward along the edge of the leaf. You should make eight slip stitches in total, reinforcing the edges and giving the leaf a clean outline.
When you reach the center, pass your hook through the matching center stitch on the opposite side and finish with one final slip stitch.

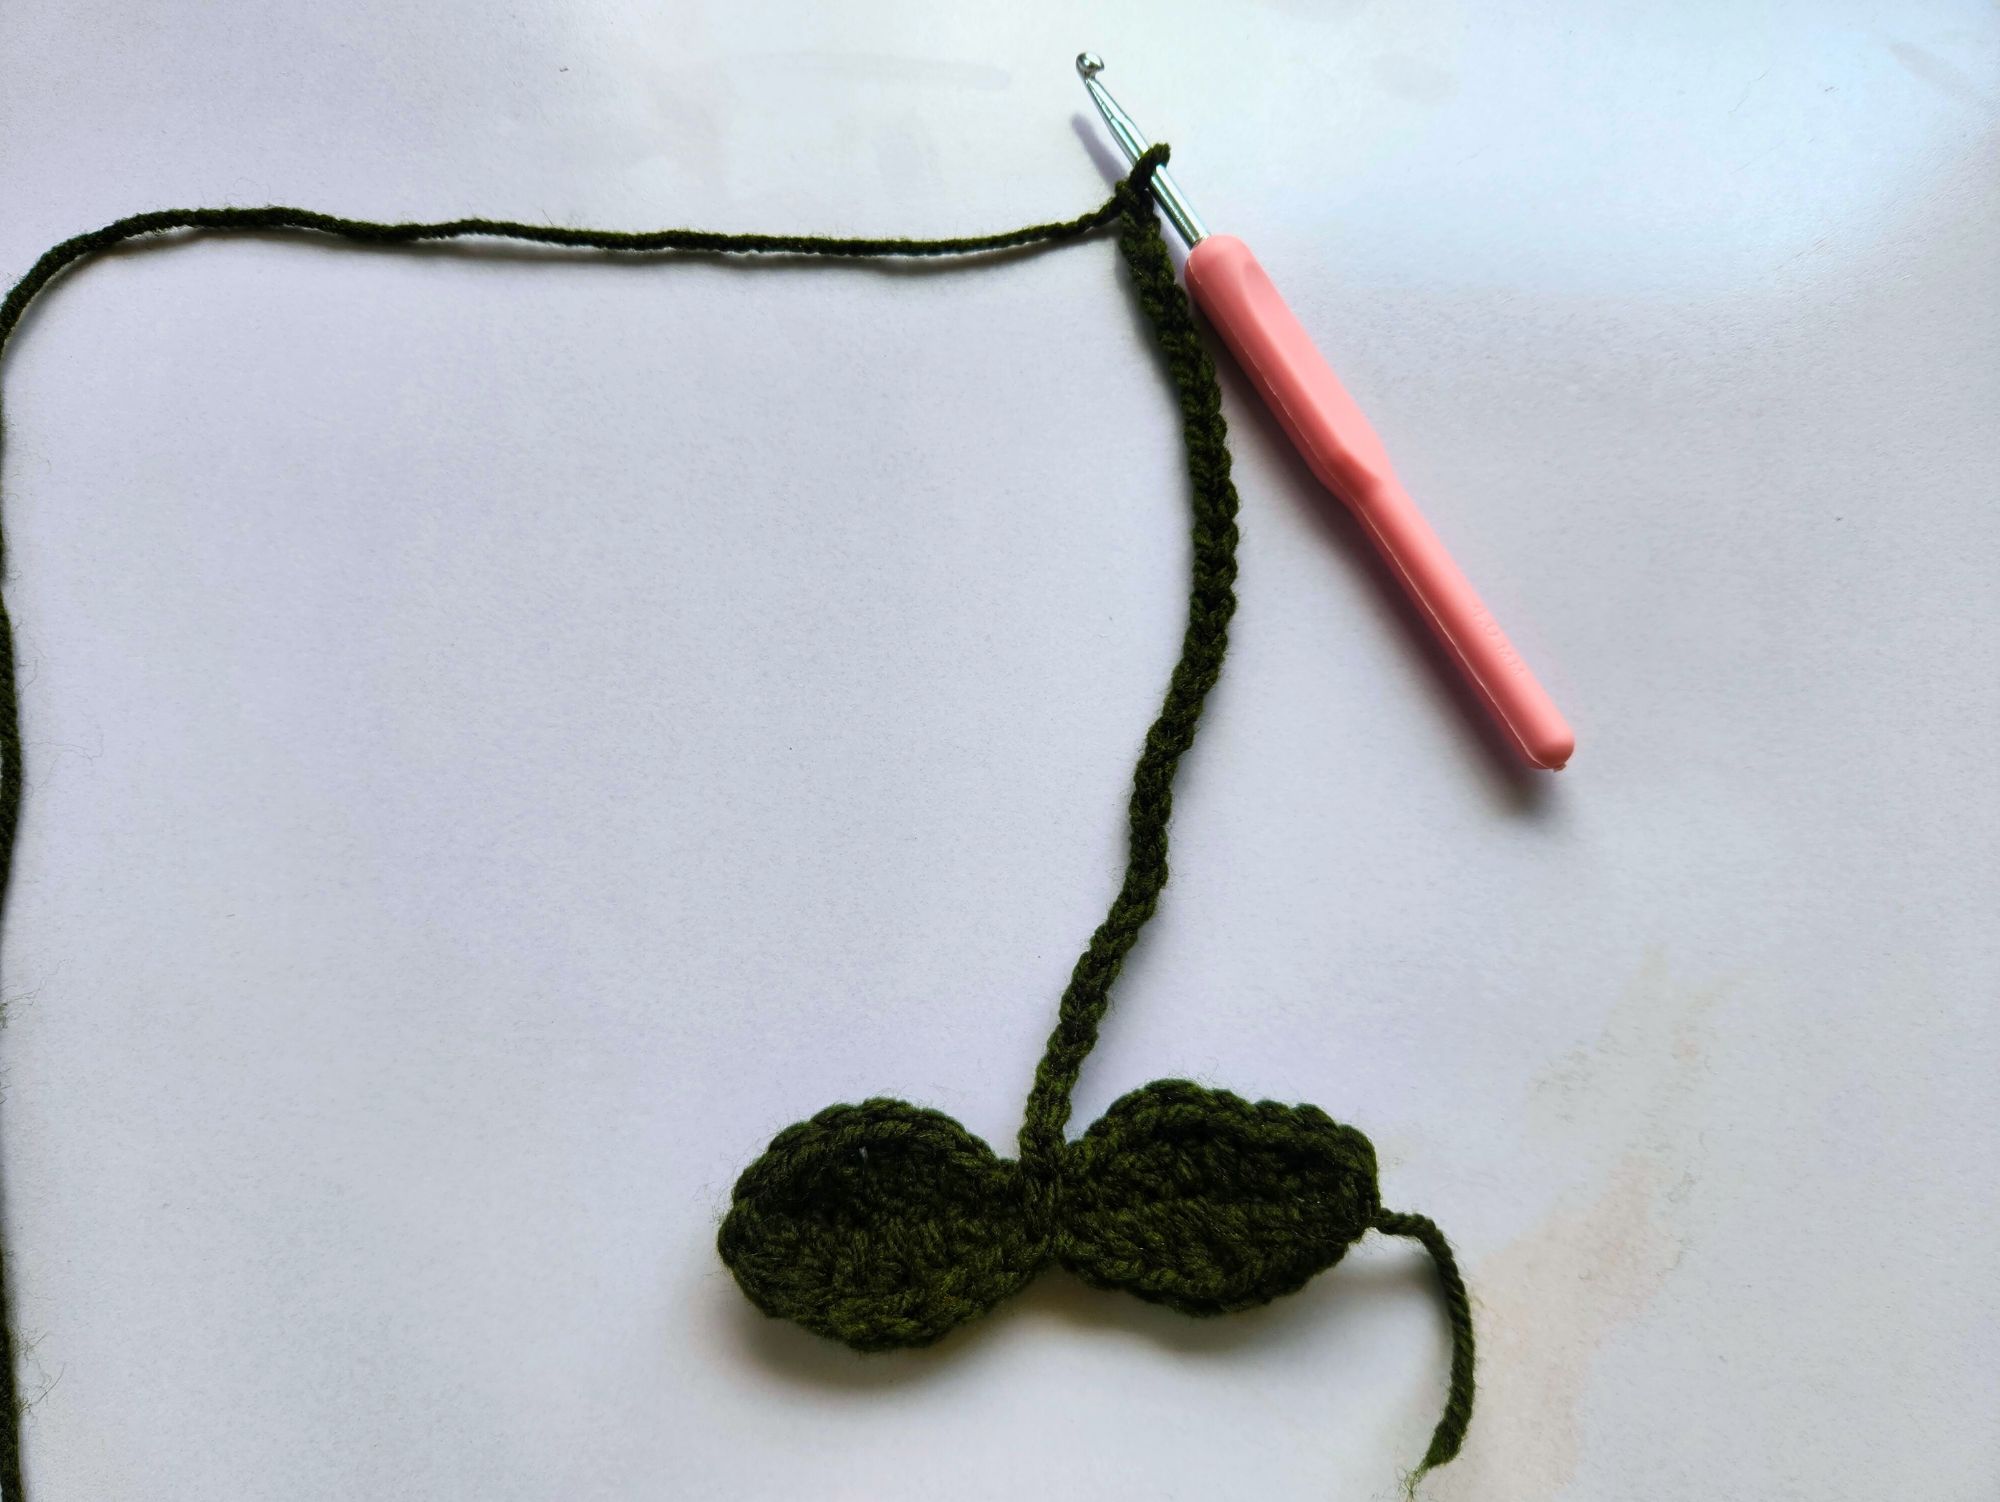
Step 7: Crocheting the Leaf Stem
Now it’s time to add the stem.
- Crochet 30 chain stitches, keeping them even and relaxed.
- This creates a long, flexible stem that can be wrapped, tied, or clipped.
To secure the stem:
- Locate the side yarn tail and the starting chain stitch at the base of the leaf.
- Insert your hook, tighten the loop, and make a slip stitch.
If you want a sturdier stem, you can slip stitch back along the chains before fastening off.
Step 8: Finishing Touches
- Cut the yarn to your desired length and pull through the loop to fasten off.
- Weave in all loose ends using a yarn needle.
- Avoid weaving ends through the center of the leaf this keeps the front smooth and polished.
- Trim off any excess yarn.
How to Use Your Crochet Leaf Deco
These crochet leaves are incredibly versatile. You can:
- Clip them onto earbuds or headphones
- Wrap them around charging cables
- Use them as gift wrap embellishments
- Add them to garlands or wall décor
- Sew them onto bags, hats, or scarves
They also make great stash-busting projects and thoughtful handmade gifts.
Final Thought
Crochet leaf decorations may look small, but they pack a lot of value into a simple project. This tutorial not only helps you create a beautiful handmade item, but it also builds confidence by teaching stitch variation, shaping, and symmetry all essential crochet skills. Whether you’re a beginner expanding your stitch knowledge or an experienced crocheter looking for a relaxing project, this crochet leaf deco is a wonderful addition to your handmade collection.
Take your time, enjoy the process, and don’t be afraid to experiment with colors and yarn types. Every leaf you make will be slightly unique and that’s the beauty of handmade crochet.