

Crochet Flower Coaster Tutorial
One of the best projects for beginners is a crochet flower coaster. These charming coasters can brighten up your coffee table, make thoughtful gifts, or simply add a touch of handmade charm to your kitchen. Even if you’ve never picked up a crochet hook before, this tutorial will guide you step by step, so you can follow along with ease.
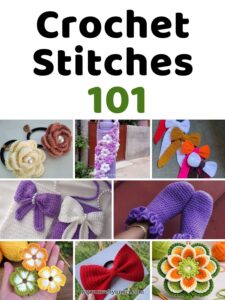
Flower coasters are perfect for practicing a variety of stitches while making something practical. try the beginner friendly crochet card holder. You’ll get hands-on experience with basic stitches like single crochet, double crochet, and slip stitch, as well as slightly more advanced stitches like half double crochet, treble crochet, and puff stitches. see this; crochet stitches 101
By the end of this project, not only will you have a beautiful coaster, but you’ll also gain confidence to try more complex crochet patterns.
Whether you’re making this as a gift or for your own home, the process is simple, fun, and rewarding. With just a few tools cotton yarn, a 3mm crochet hook, stitch markers, a darning needle, and scissors you can complete this project in a single sitting. Take your time, enjoy the process, and don’t worry if your first attempt isn’t perfect. Crochet is all about learning as you go, and each stitch gets better with practice.
See more; Crochet stitches 101
Materials You’ll Need
- Cotton yarn in your choice of color
- 3mm crochet hook
- Stitch marker
- Darning needle
- Scissors
Optional: Different colored yarns if you want multi-colored petals or a vibrant flower center.
Step 1: Starting with a Magic Ring
- Hold the yarn tail with your right hand, leaving a long tail of about 20cm.
- Wrap the yarn around your pinky once with your left hand.
- Bring the yarn around the back of your index finger, then over your middle finger to create a cross.
- Pinch the crossover point with your thumb.
- Pick up your crochet hook with your right hand, insert it through the loop on your middle finger, wrap the yarn over the hook from back to front, and pull it through.
Congratulations! You’ve created your magic ring, the foundation of your flower.
Step 2: Creating the First Round
We’ll start with double crochet stitches:
- Yarn over and insert your hook into the center of the magic ring.
- Pull up a loop (3 loops on your hook).
- Yarn over and pull through the first two loops, then yarn over again and pull through the remaining two loops.
- Repeat this process to make 13 double crochet stitches in total.
- Pull the yarn tail to close the magic ring tightly.
- Place a stitch marker on the last stitch to keep track of your starting point.
- Finish the round with a slip stitch into the first double crochet.
Take a moment to admire your first round! The little V shapes at the top of each stitch are perfect indicators of your progress.
Step 3: Round Two – Puff Stitches
This round introduces the puff stitch, which gives the flower a raised, textured look:
- Switch to a new color if desired, leaving a small tail to weave in later.
- Start with 14 chain stitches as a turning chain, counting this as your first incomplete double treble crochet.
- Work three double treble crochet puff stitches into the first stitch of the previous round. Remember: yarn over three times, insert the hook, pull up a loop, and then pull through two loops at a time until you finish each incomplete double treble crochet.
- Chain three to create space before moving to the next puff stitch.
- Repeat this 13 times around the ring.
- Finish the round with a slip stitch, tighten the loop, and weave in the yarn tail.
This round adds volume and makes the flower look more like a real blossom.
Step 4: Round Three: Double Crochet Petals
In this round, we’ll work into the chain spaces created in round two to form the petals:
- Chain three to start, counting as your first double crochet.
- Place a stitch marker in the third chain stitch for guidance.
- The pattern is two double crochets, two chains, two double crochets into each large chain space from the previous round.
- Repeat this pattern 13 times around the flower.
- Slip stitch into the stitch with your marker to finish the round.
- Remove the stitch marker, leave a long tail, and weave it in on the back of your work.
This step gives the flower its open, lacy look, creating a delicate, hand-crafted finish.
Step 5: Final Touches
- Check all yarn ends and ensure they are woven securely into the back of the coaster.
- Trim any excess yarn.
- Gently shape the petals with your fingers, adjusting any uneven edges.
And just like that, your crochet flower coaster is complete! You now have a charming handmade piece ready to use or gift.
Tips for Beginners
- Counting stitches: Always count your V shapes at the top of each stitch. It helps you avoid missing stitches or adding extras.
- Tension control: Keep your yarn slightly loose when starting the first loop, then adjust as needed for uniform stitches.
- Practice makes perfect: Don’t worry if the puff stitches or treble crochets feel tricky at first. Each attempt gets easier.
- Use stitch markers: They’re especially helpful for keeping track of rounds and sets.
- Experiment with colors: Try multi-colored petals or centers to make your flowers pop.
Final Thought
Crocheting a flower coaster is more than just making a functional item it’s about learning new skills, enjoying the creative process, and making something beautiful with your hands. Even if this is your first crochet project, following these steps carefully will give you a lovely, professional looking result. Once you’ve mastered this, you can create sets of coasters, decorative flowers, or even expand into doilies and larger motifs.
Take your time, enjoy each stitch, and remember: every handmade item carries a bit of your personality and care. Happy crocheting!

One Comment