Simple Crochet Bow Tie tutorial
In this detailed tutorial, I’ll walk you through the step by step process of creating a simple crochet bow. I’m really happy you’re here and ready to try crochet. If you’re feeling a little unsure, that’s completely normal. Every crocheter starts as a beginner. You’re in the right place, and you can absolutely do this. If you want a gentle start with more beginner projects, check out our Beginner Friendly Crochet Card Holder Tutorial and Crochet Scrunchie Tutorial for step-by-step guidance.”
For today’s project, we’re making an adorable crochet bow. It’s a great beginner-friendly project and comes together in just a few minutes, making it perfect for your very first attempt. Along the way, you’ll learn essential basics like how to create a slip knot, how to position your yarn comfortably in your left hand, and how to work a simple chain stitch. I’ll walk you through everything step by step, so take your time, stay relaxed, and enjoy the process. For a deeper explanation of these stitches, see Crochet Stitches 101 before starting your bow.”Crochet Scrunchie Tutorial or even the Beginner-Friendly Crochet Card Holder Tutorial.
Materials needed to make a Crochet Bow tie
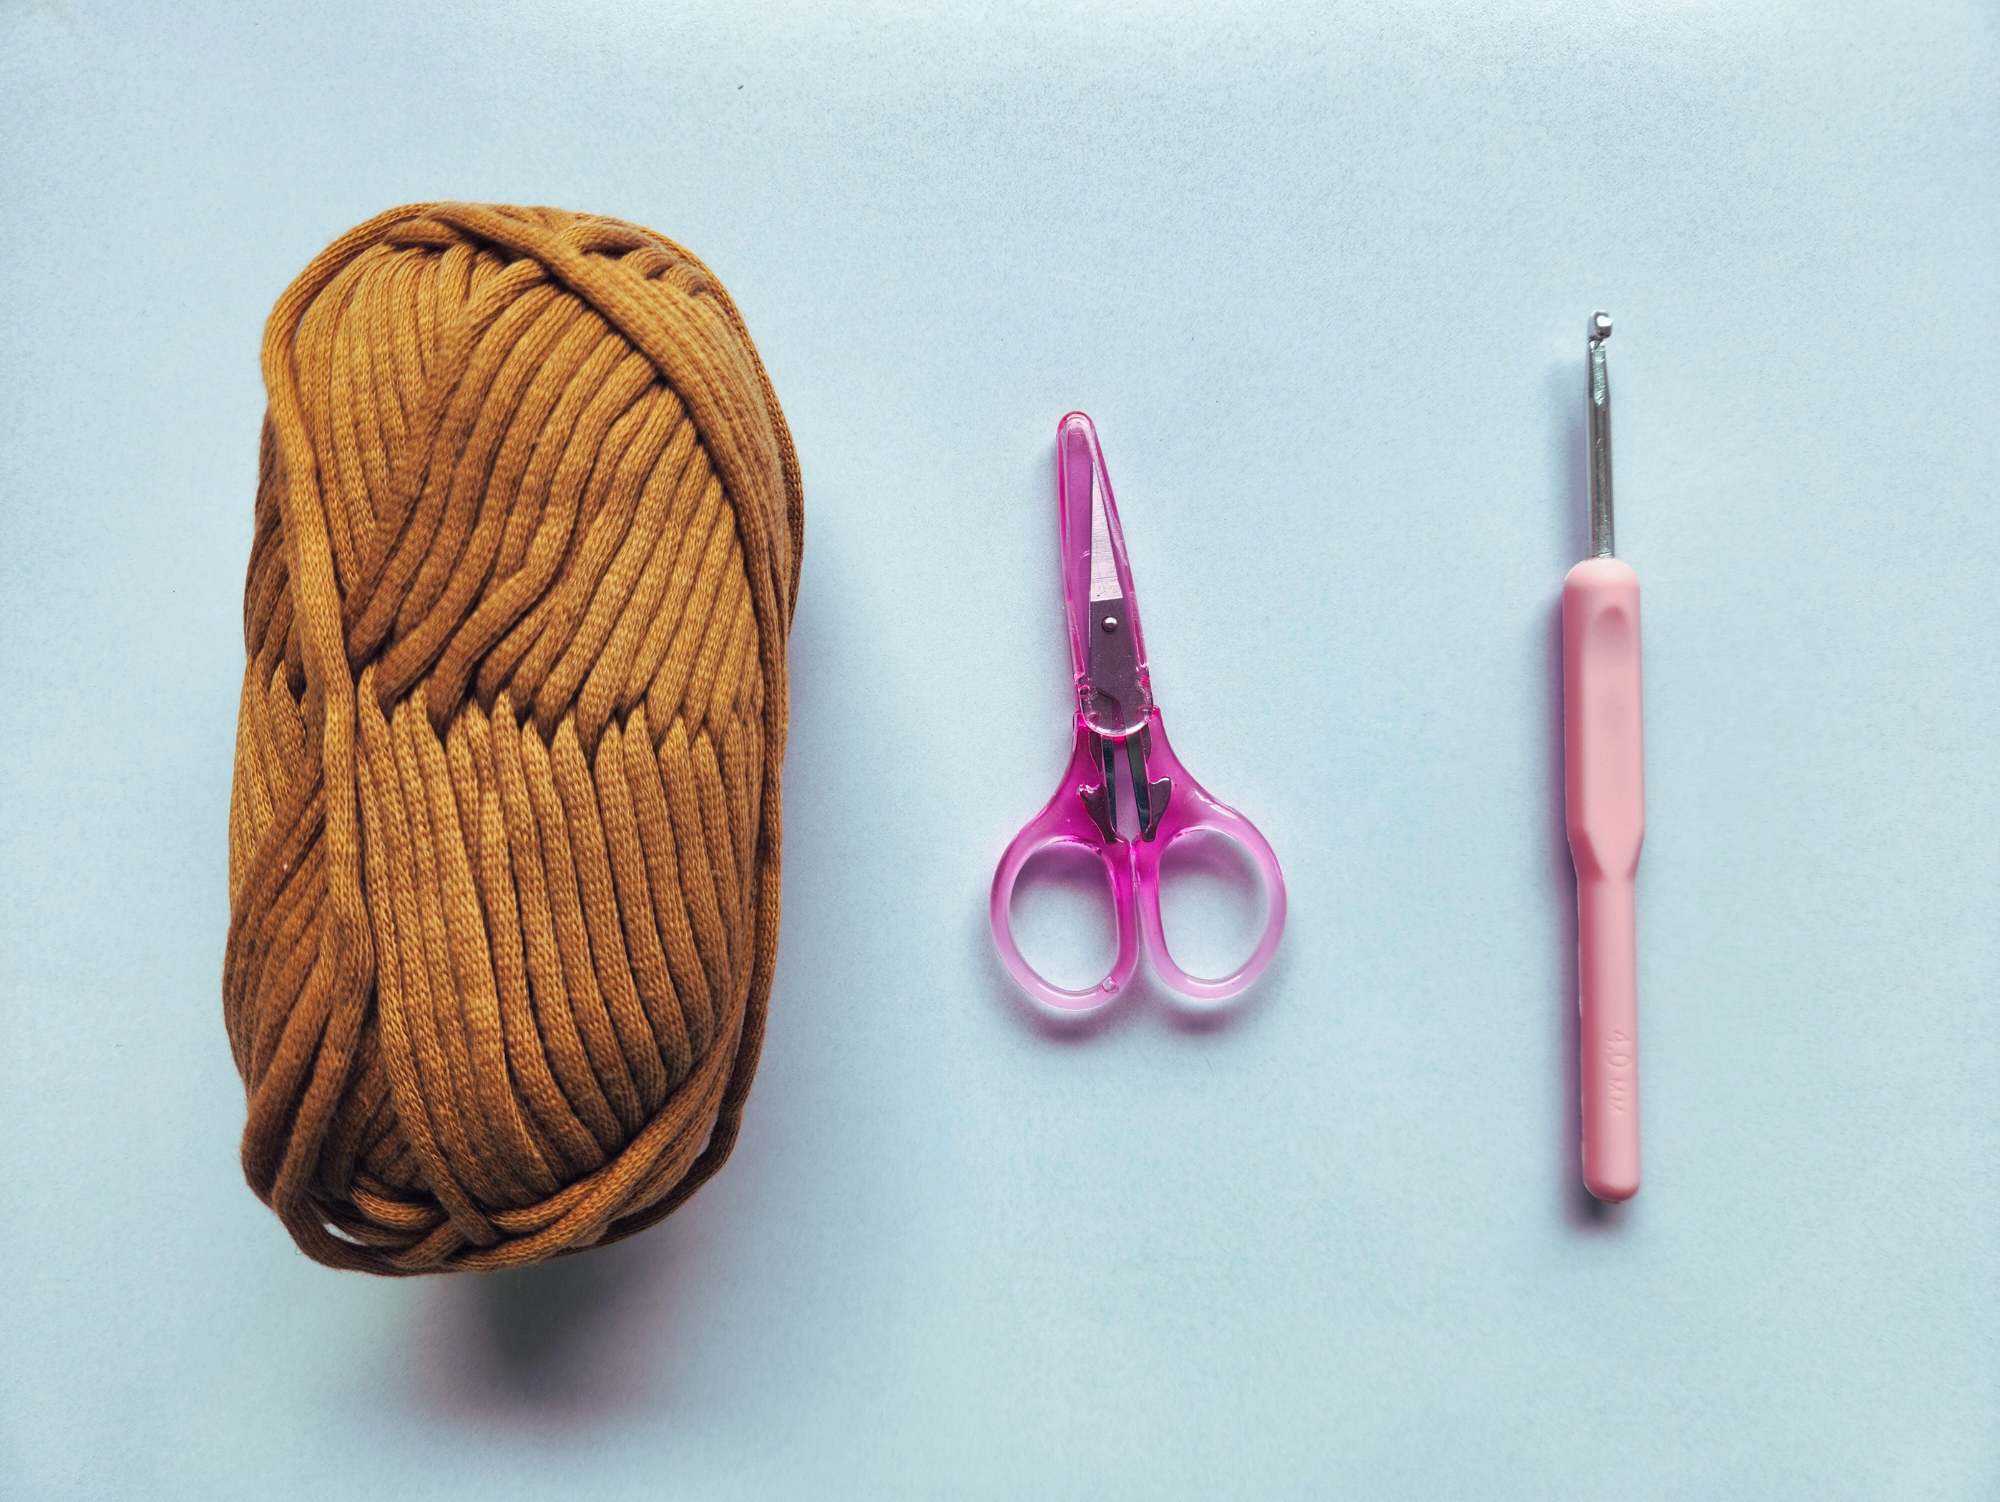
Before we start crocheting, let’s talk about materials. Choosing the right yarn makes a big difference, especially when you’re new. For this bow, tube cotton yarn is an excellent choice. It’s thick, soft, and slightly stretchy, which makes it easy to grip and control. One of the best things about this yarn is that it’s very forgiving. Your bow will still look neat even if your tension isn’t perfect. It also doesn’t split easily, so your hook won’t snag as you work.
Feel free to pick any color you love. I’m using a gold for this tutorial, but any shade of tube cotton yarn will work beautifully. Pair it with a crochet hook sized between 4 mm and 5 mm for the best results. Finally, keep a pair of scissors nearby so you can neatly cut the yarn when you’re finished.
Now that everything is ready, let’s begin crocheting your first bow!
How to make a simple Crochet Bow Tie
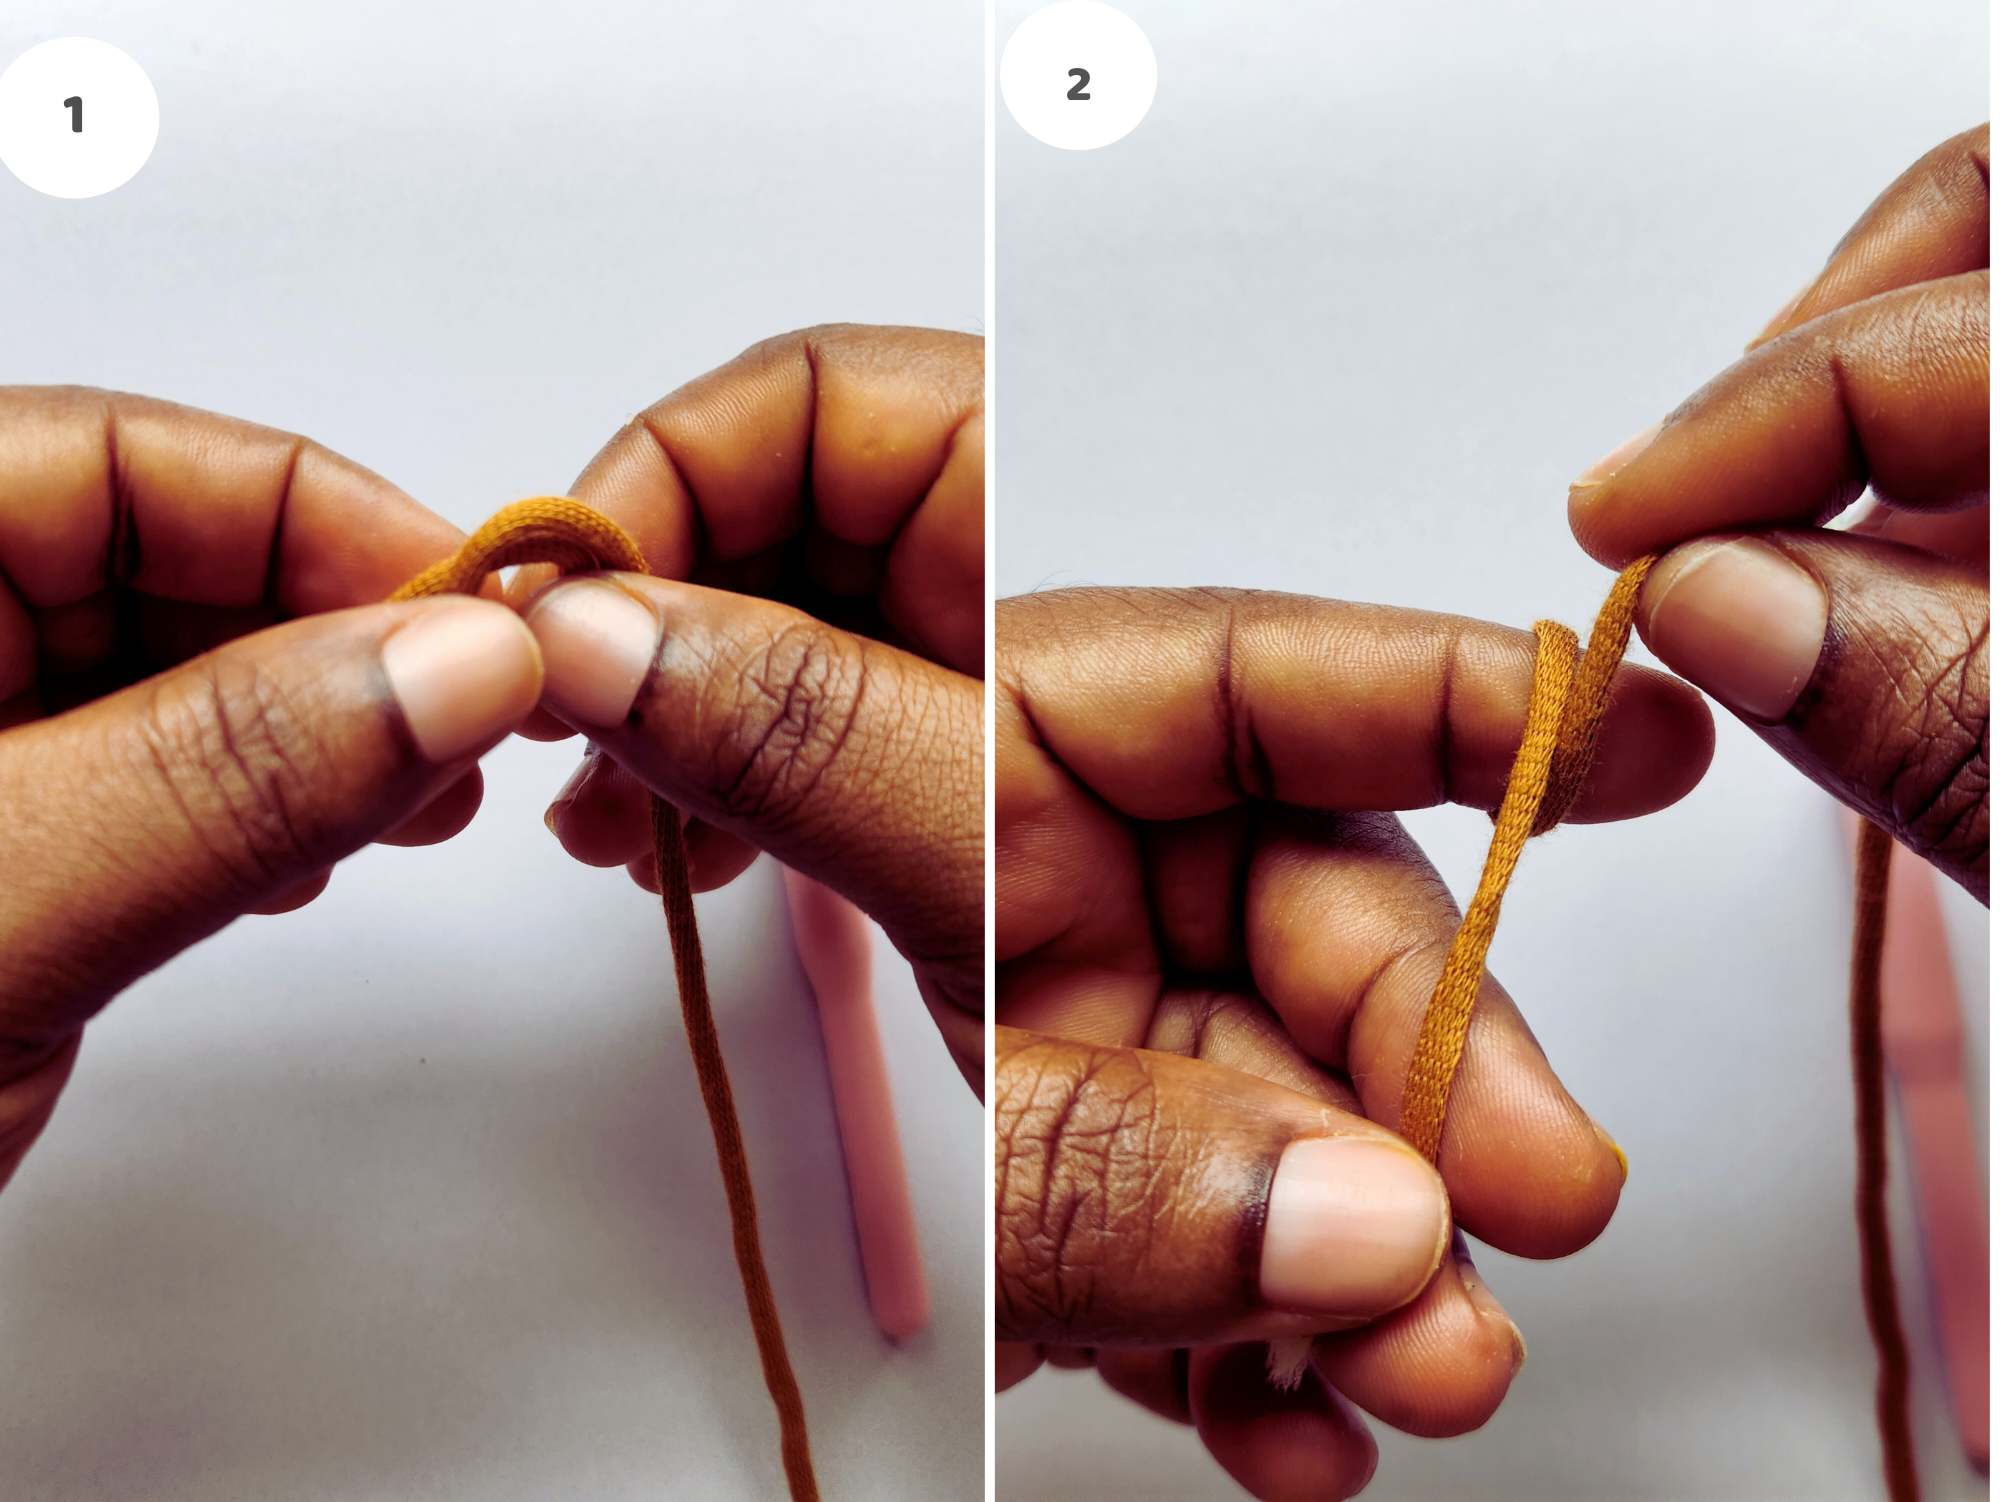
Step 1: Create a Slip Knot
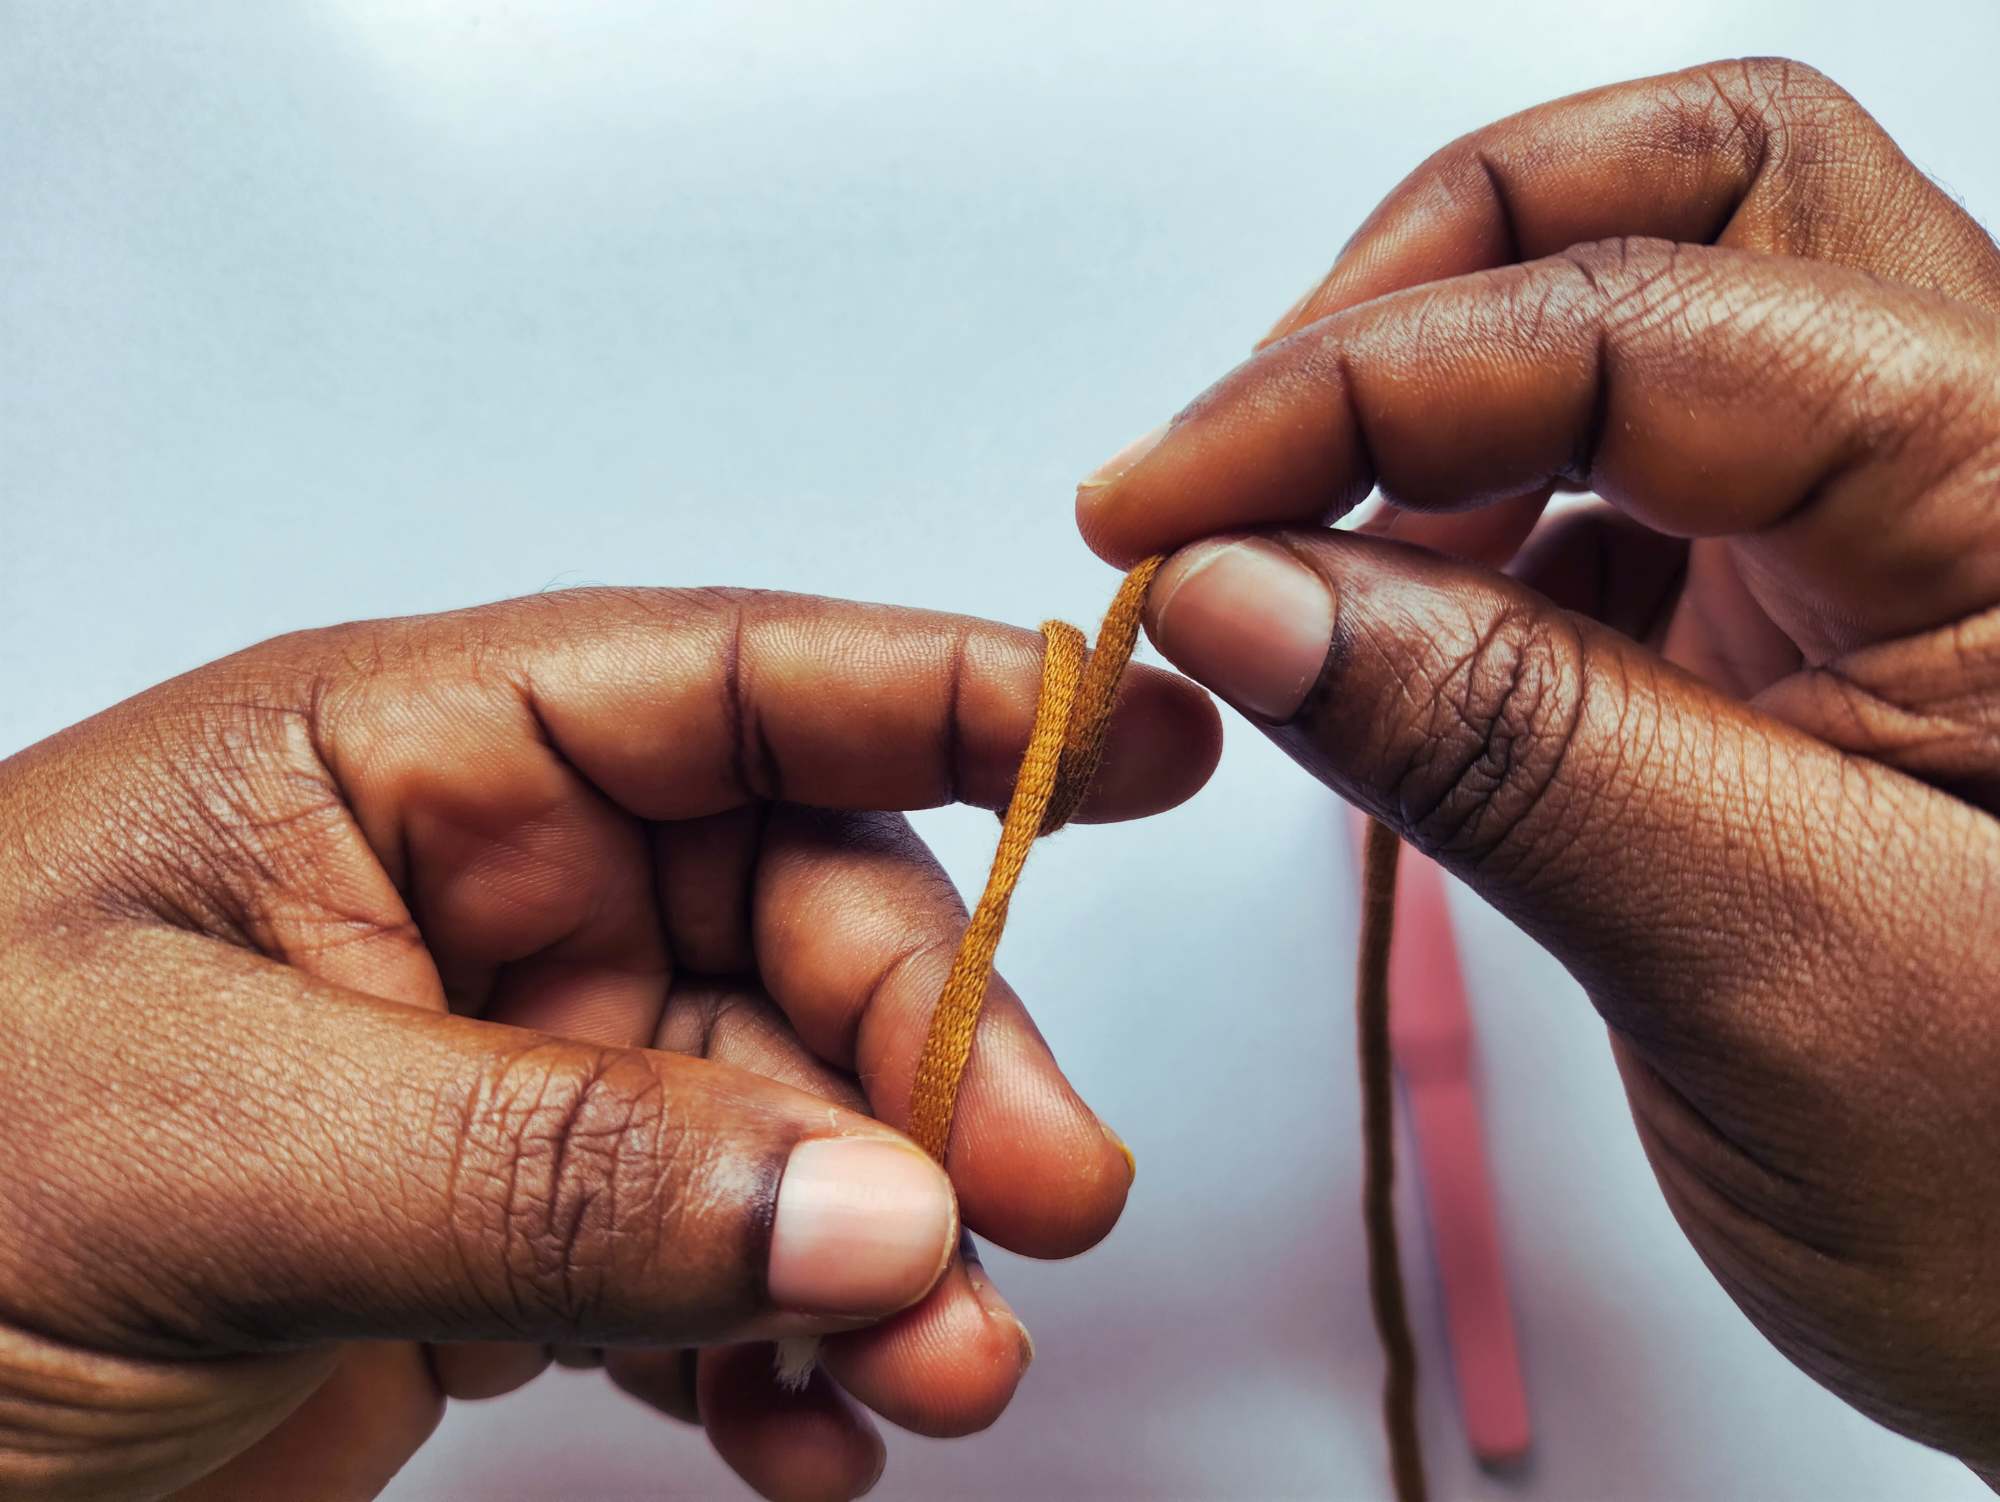
To begin, pick up your yarn and get it positioned correctly. The short tail end should be on your left side, while the yarn connected to the ball (the working yarn) stays on the right.
Form a loop with the yarn, then carefully slide that loop off your finger. Use your left hand to pinch the spot where the yarn crosses so it doesn’t come undone. With your right hand, hold your crochet hook and place it through the loop. Pull the yarn gently to secure it onto the hook.
Next, tighten the knot by pulling both the yarn tail and the working yarn at the same time. You’ve just made your slip knot—well done!
Step 2: Adjusting Your Loop and Holding the Yarn
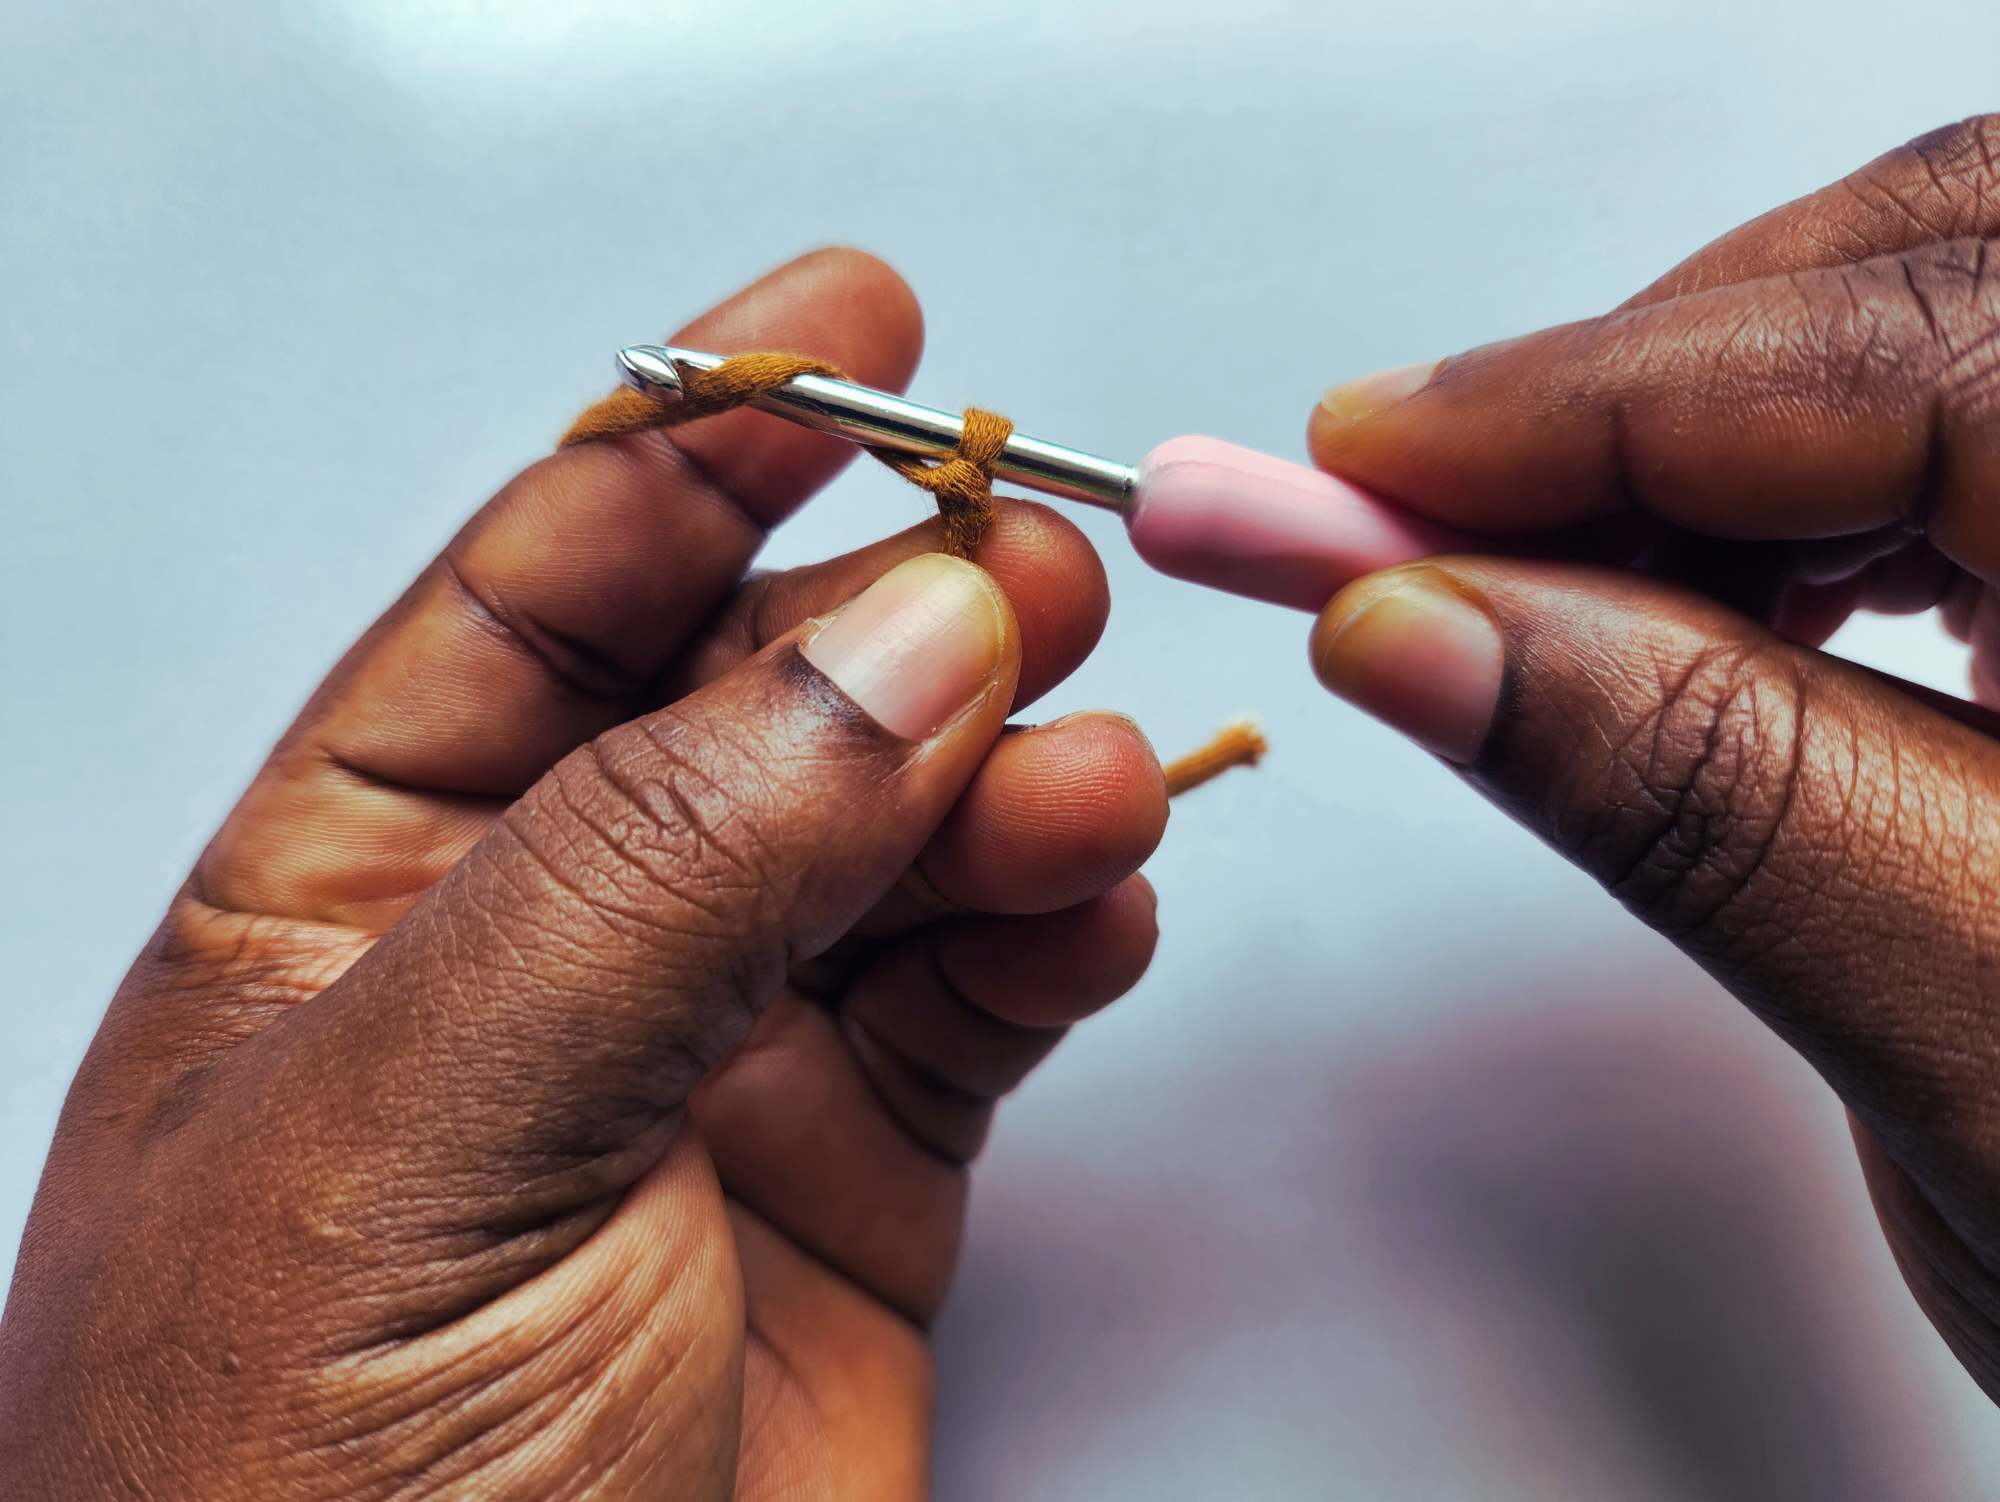
Before moving on, take a moment to check the size of the loop on your hook. It shouldn’t be too tight. Leave a small amount of space, roughly enough to fit two hook heads inside the loop. This extra room will make it easier to pull the yarn through and help your stitches glide smoothly as you crochet.
Start by sliding the loop on your hook up to the widest part of the hook shaft. This helps set the correct loop size. If moving your hook feels stiff or uncomfortable, the loop is probably too tight loosen it slightly. If it looks overly loose, give the yarn a gentle tug to snug it up. Don’t stress about getting it perfect right away. Crochet is all about feel, and that confidence comes quickly with practice.
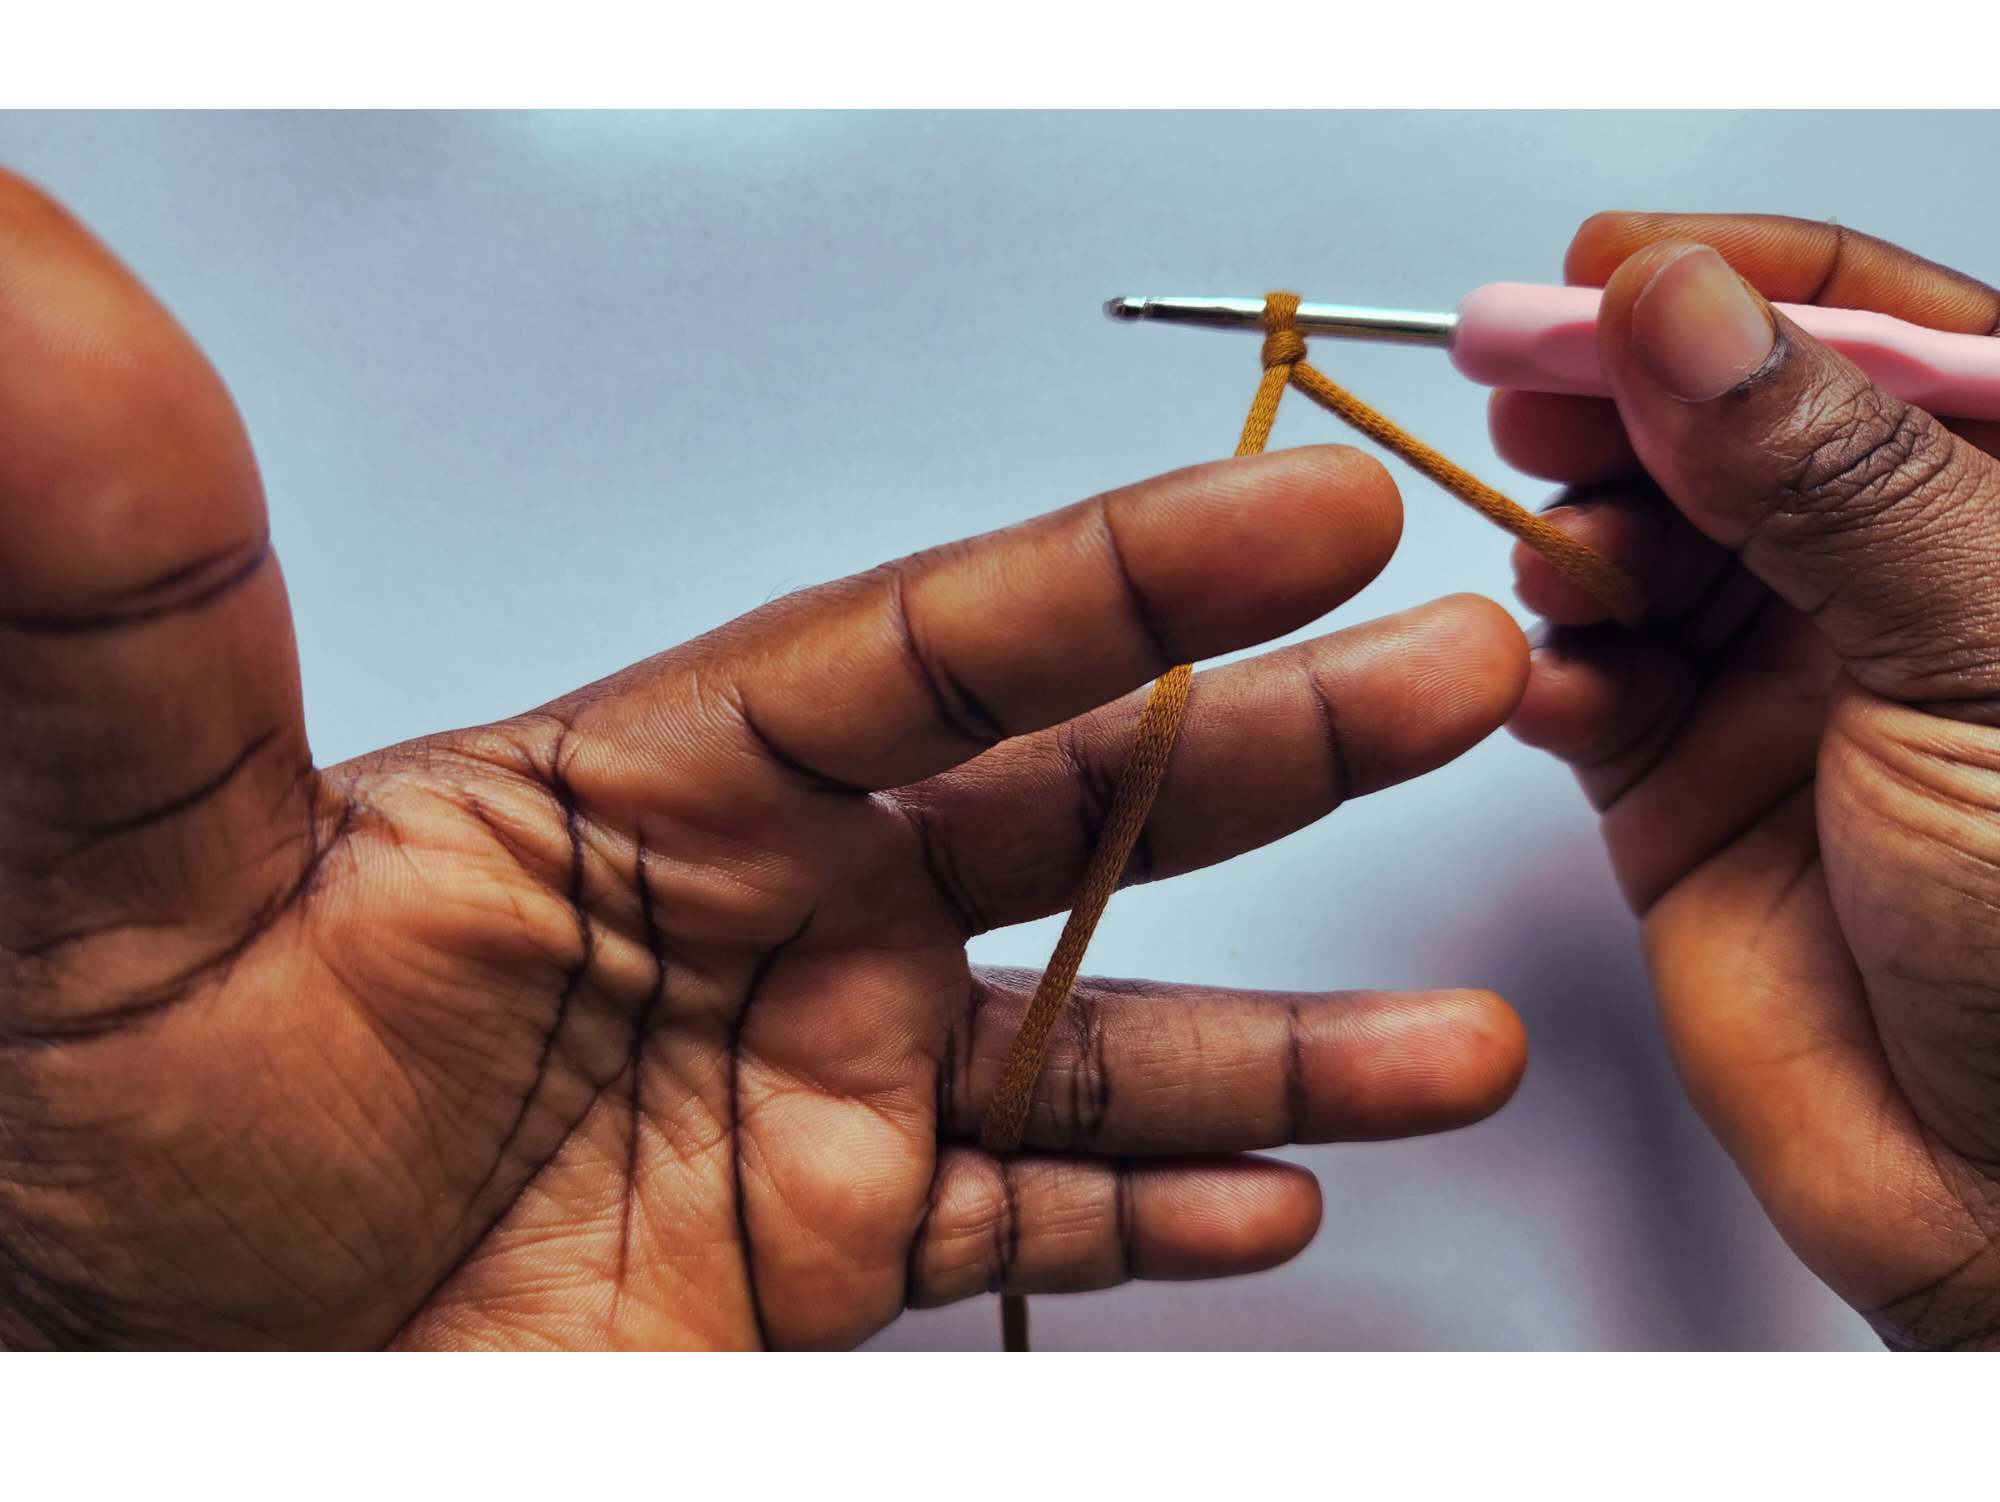
Now let’s talk about how to hold your yarn using your left hand. Open your left hand and guide the yarn between your pinky and ring fingers. From there, bring the yarn across and over your index finger. Use your thumb and middle finger to lightly pinch the slip knot near the hook to keep everything steady.
Let’s review that position once more. Keep your index finger raised, this is what controls your yarn tension. Lifting your finger higher increases tension, while lowering it relaxes the yarn. Try moving your finger up and down and notice how the yarn responds. This simple movement gives you full control as you crochet.
Step 3: Making Your First Chain Stitch
Now it’s time to learn the most fundamental crochet stitch: the chain stitch.
Position your hook underneath the yarn, with the hook tip facing behind it. Use the hook to catch the yarn from the back and pull it forward. Avoid scooping the yarn from the front this is a very common beginner mistake. A good rule to remember is: always grab the yarn from behind.
Once the yarn is on your hook, angle the hook tip slightly downward and toward you. This small adjustment helps the hook glide smoothly through the loop already on your hook. Pay attention to how the hook moves as it passes through the loop—this motion is key.
If it feels awkward at first, that’s completely normal. Many beginners find this step tricky in the beginning. Experiment with different angles and small hand movements until it starts to feel more natural. With just a bit of repetition, it will click.
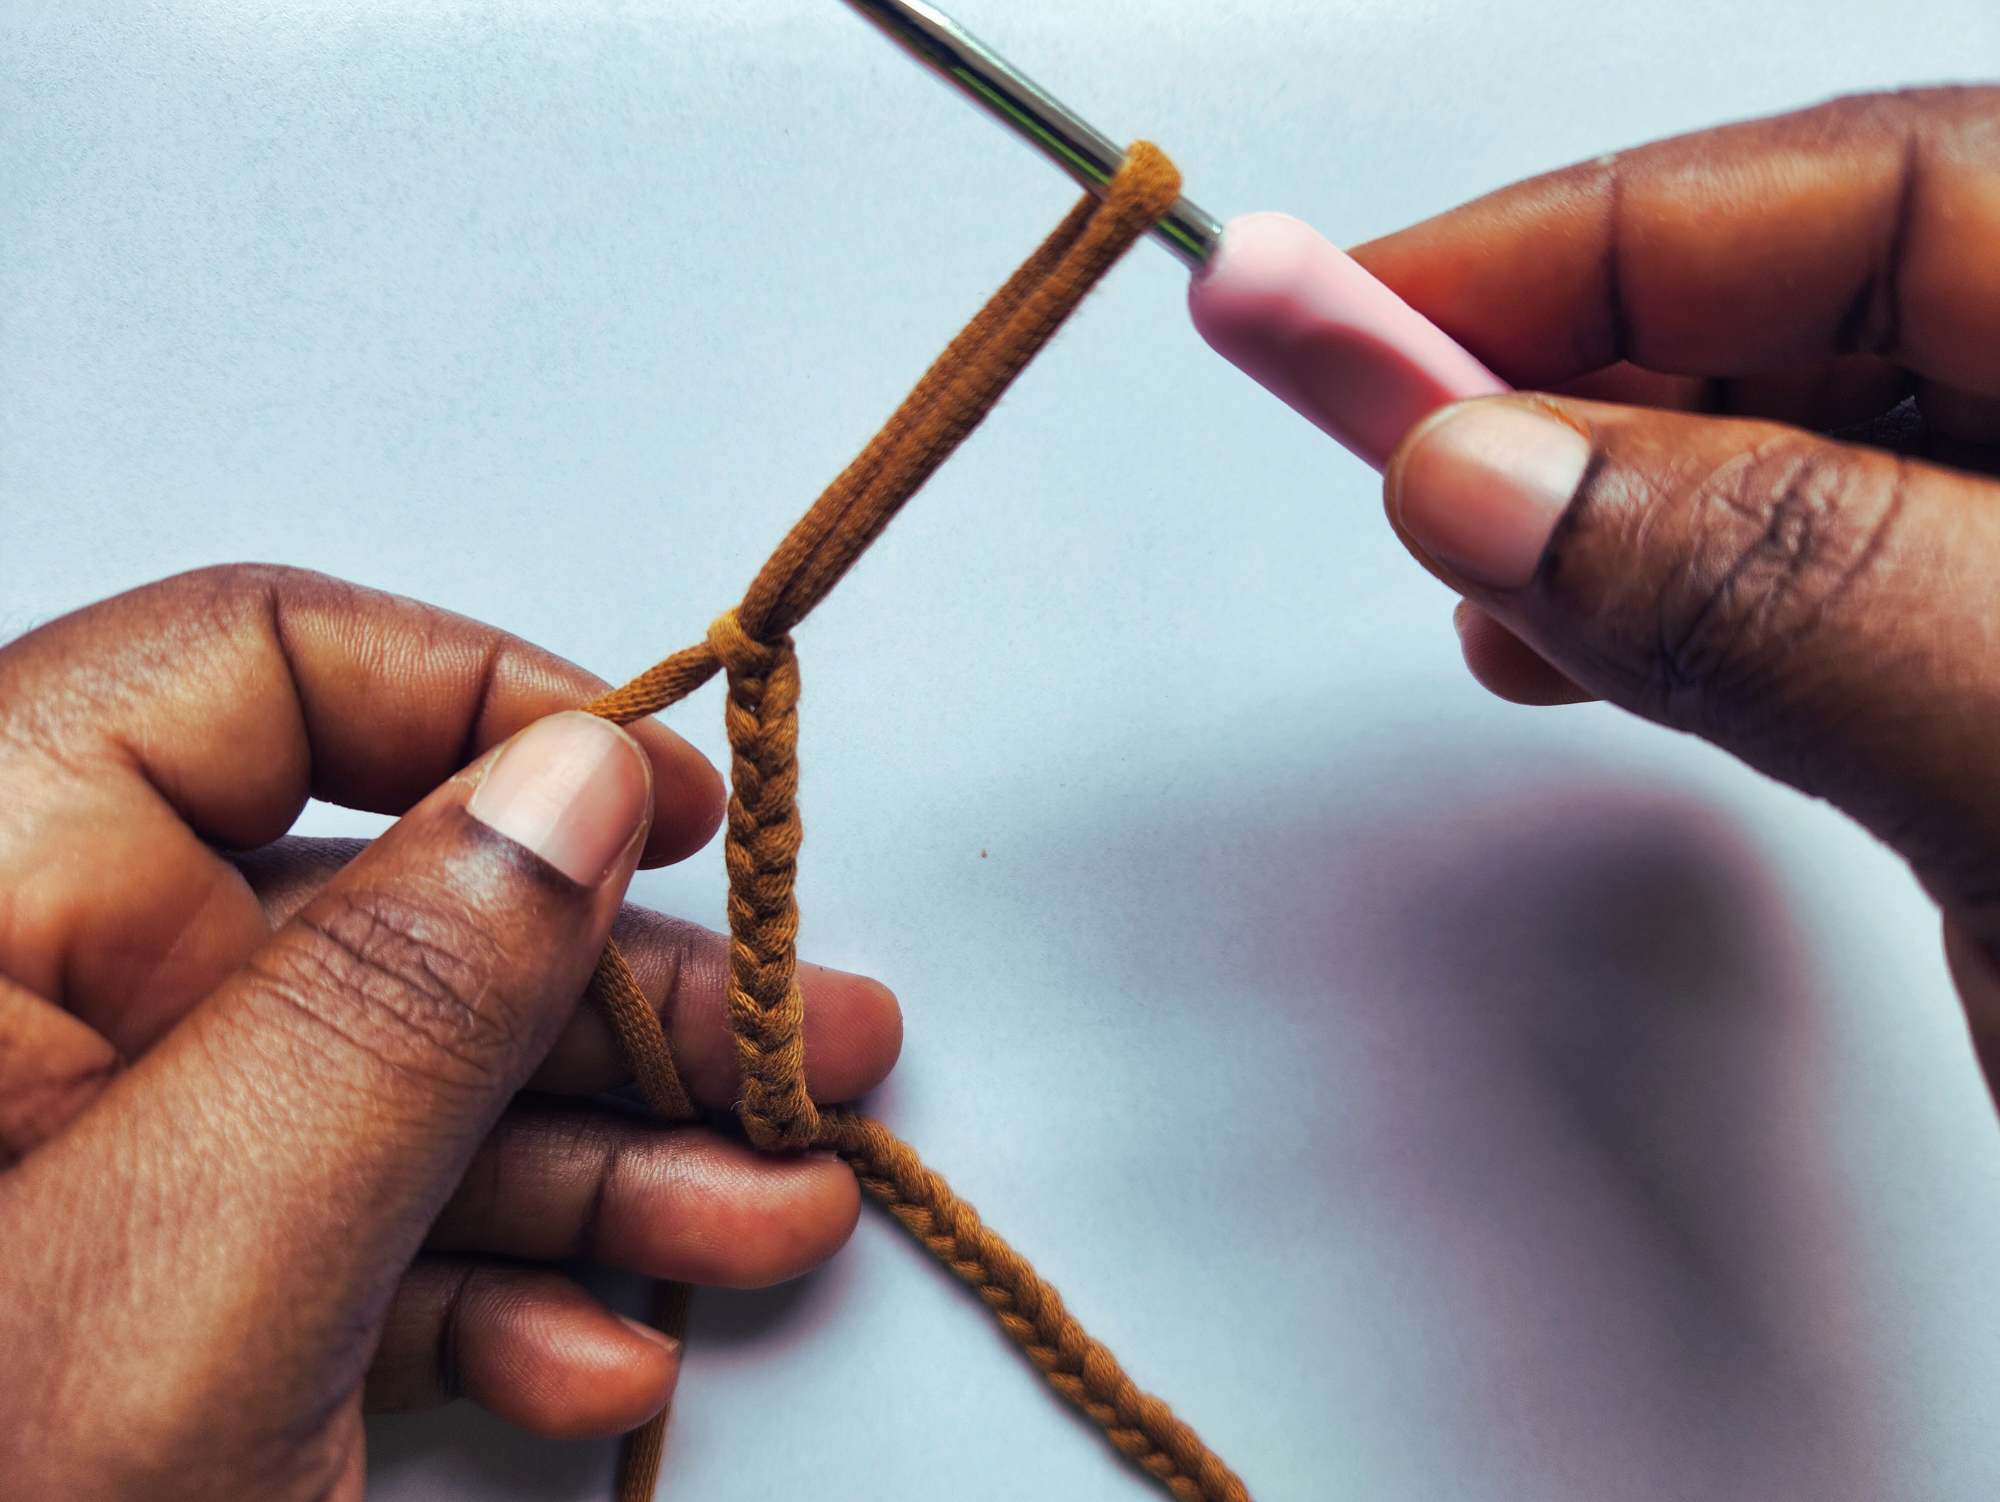
Congratulations you’ve just completed your very first chain stitch! Take a moment to look closely. Right beneath your hook, you should see a small “V” shape. That’s your chain stitch, and it’s the foundation of almost every crochet project you’ll ever make.
Step 4: Continuing the Chain Stitch
Before you continue, take a quick moment to check your loop. It shouldn’t feel tight or restrictive. You should be able to slide it smoothly up to the widest part of your hook. If it resists, loosen it slightly so your hook can move freely.
A quick tip for beginners: instead of pinching the chain with your thumb and index finger, try keeping your left index finger lifted and relaxed. Hold the chain just below the hook using your thumb and middle finger. This grip gives you better control over the yarn without constantly adjusting your hand position.
To make the next chain stitch, place your hook under the yarn with the hook tip sitting behind it, just like before. Scoop the yarn from the back, then angle the hook slightly downward and inward. Pull the yarn through the loop on your hook. As you do this, experiment with the hook angle you’ll notice that at a certain position, the movement feels much smoother.
Take a look at your work. You’ve just created another chain stitch! Each stitch should resemble a small “V.” Nicely done your chain is starting to grow.
Step 5: Building Your Chain
Let’s make another chain stitch together. Remember to keep the loop loose enough to slide easily on the hook and keep your left index finger raised to guide the yarn.
Once again, place your hook behind the yarn, scoop it from the back, tilt the hook downward and inward, and pull the yarn through the loop on your hook. Great job! You’ve now completed three chain stitches.
Now it’s time for a little practice. Try making the next two chain stitches on your own using the same steps. Take your time and focus on keeping your movements smooth and relaxed.
You should now have five chain stitches. Notice how each “V” shape connects neatly to form a chain. Let’s count them together by looking at the V-shaped stitches: one, two, three, four, five. Well done!
Continue chaining until you reach a total of 55 chain stitches. When finished, count them again to be sure your final stitch should be number 55.
Step 6: Finishing the Chain
Once all 55 chain stitches are complete, gently pull the loop to make it a bit longer. Set your crochet hook down and use scissors to cut the yarn. You’ll see two yarn ends after cutting that’s completely normal.
Pull the strand that’s still connected to the yarn ball. The loose tail will slide free easily. You now have a completed chain of 55 stitches great work!
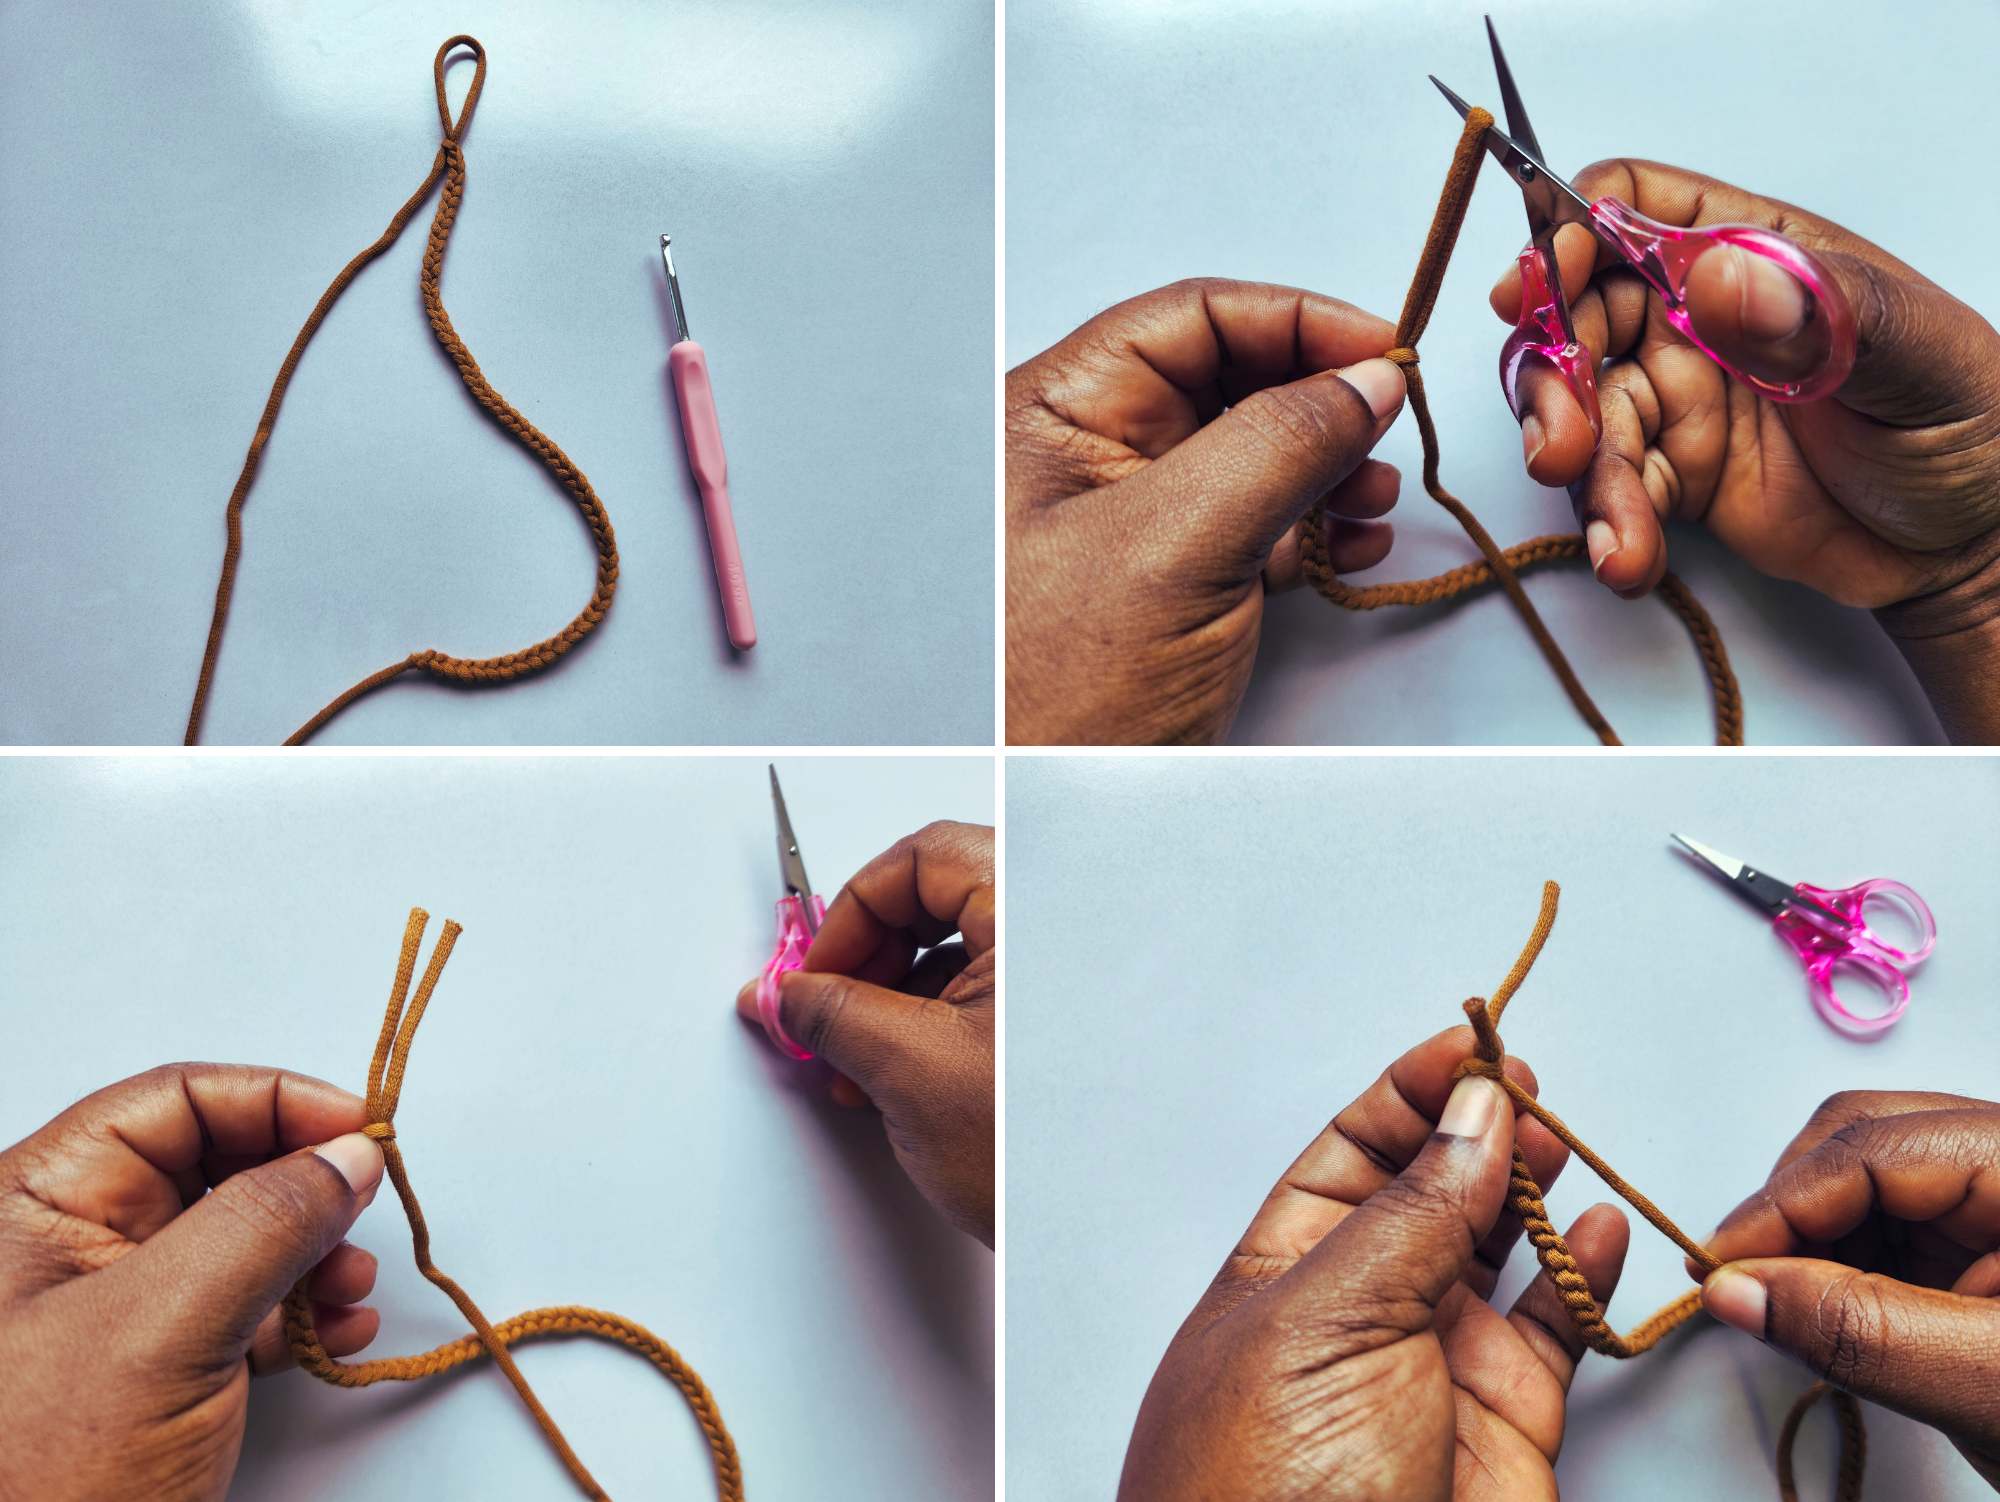
Step 7: Turning the Chain into a Bow
To finish your bow, pull one yarn tail snug and trim away any excess. Then pull the other yarn tail tight and trim that end as well.
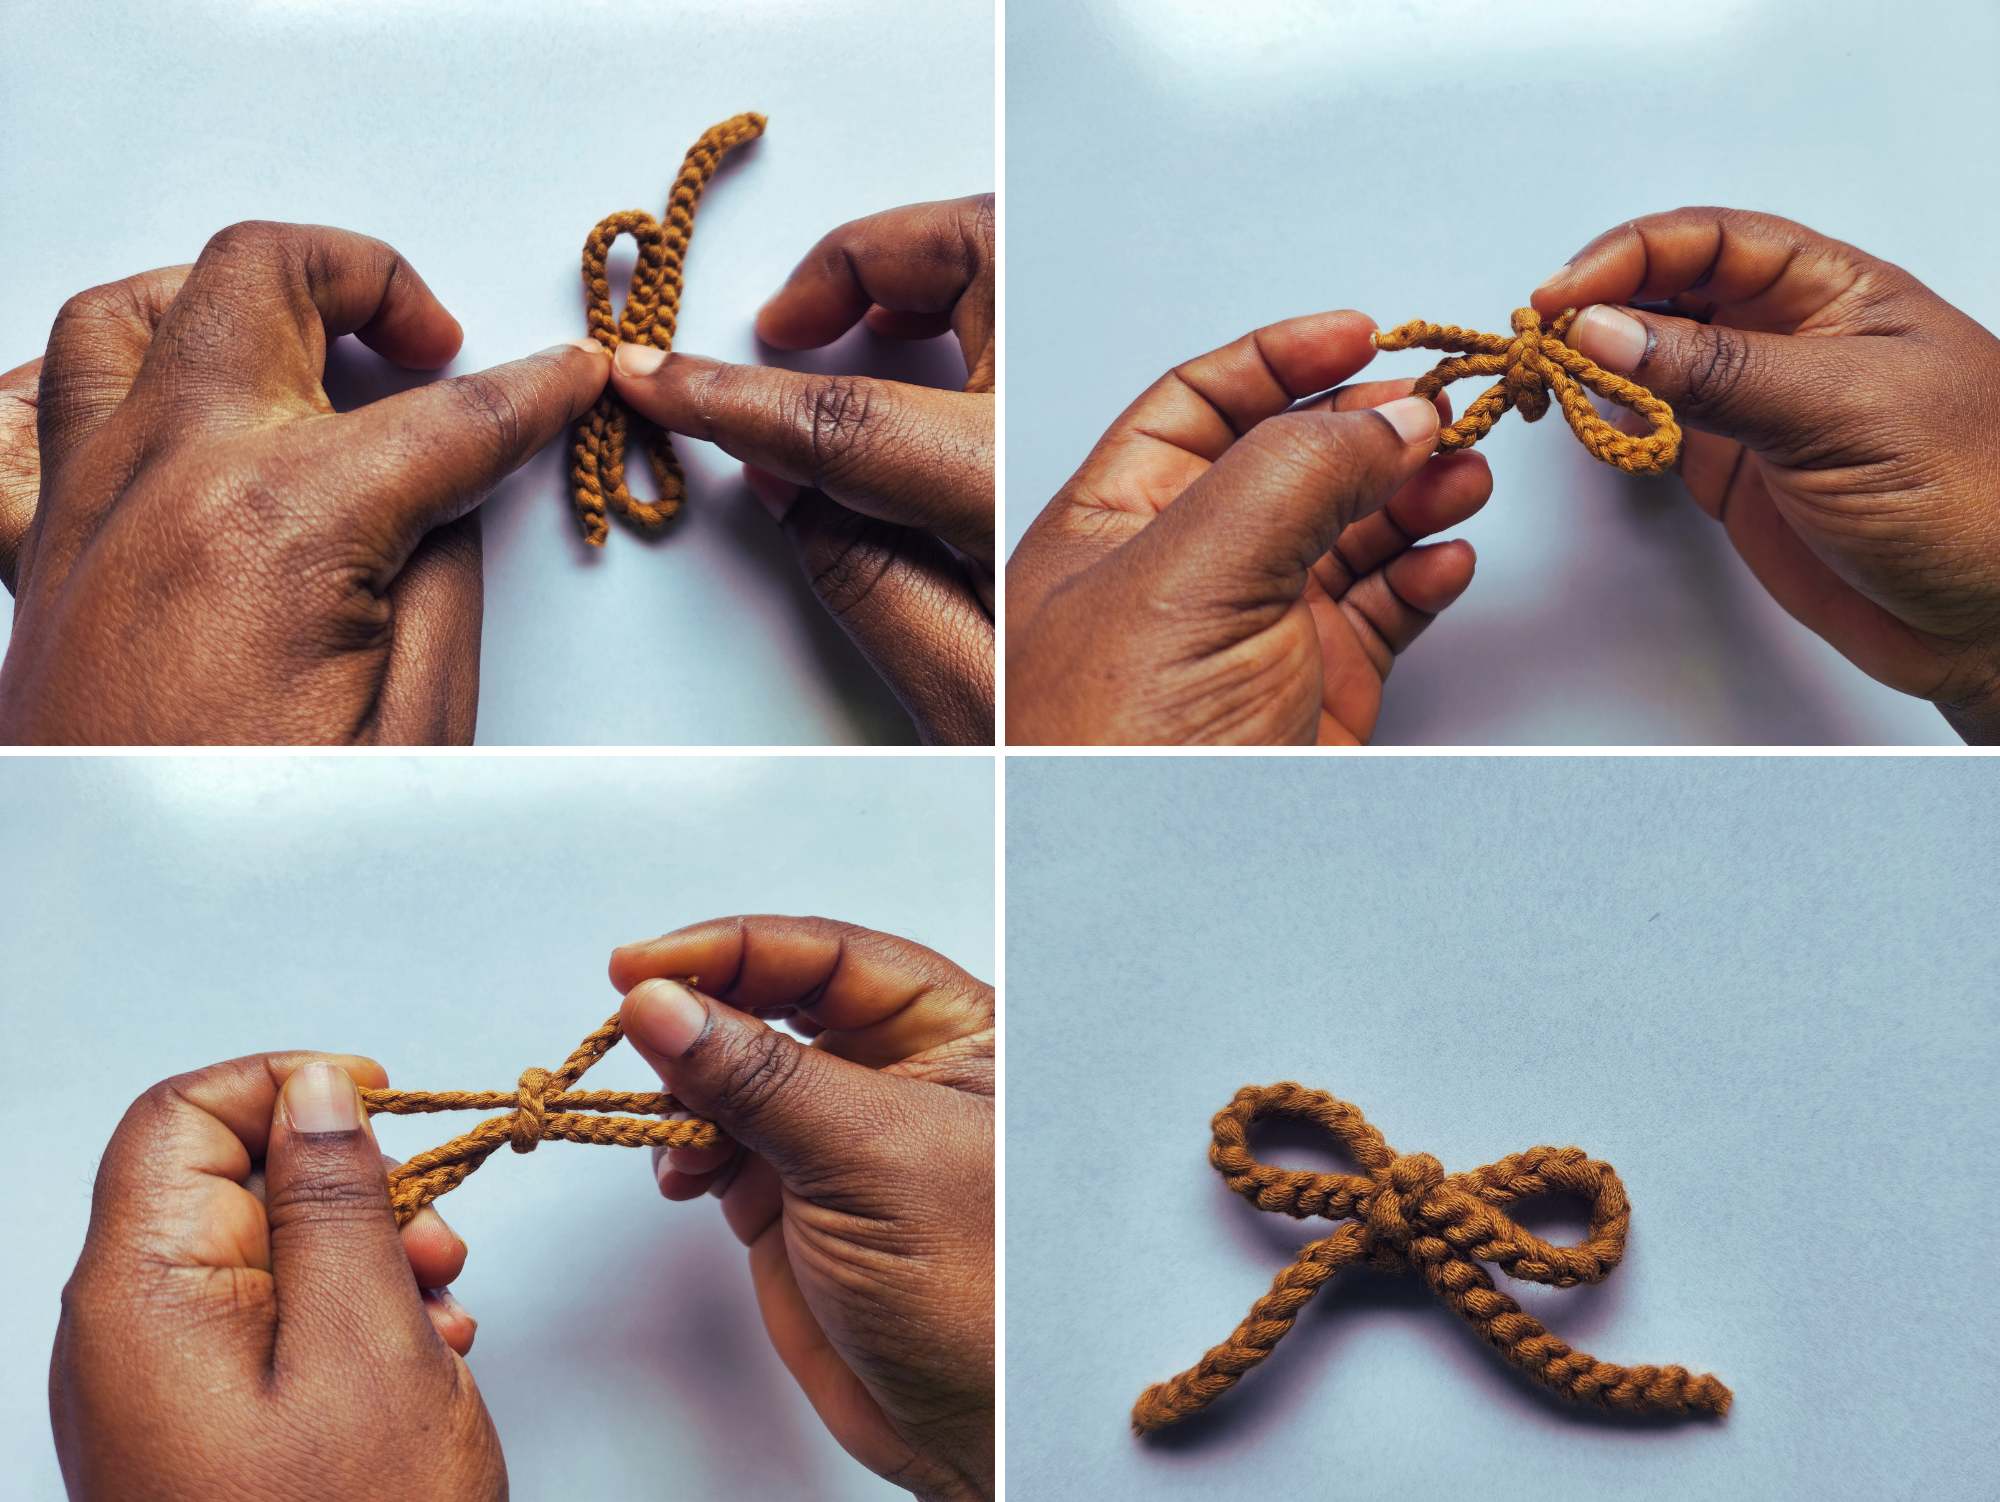
Next, fold the chain to start shaping the bow. Pinch the center of the folded chain with your left hand. Using your right hand, wrap one end of the chain around the middle, moving from the back toward the front. Thread the end through the loop you’ve created and pull it tight.
Adjust the loops until the bow looks balanced and neat.
And there it is your finished crochet bow! It’s cute, simple, and incredibly versatile. You can use it to decorate a bag, attach it to a hair clip, or even wrap it around your earphones for a fun handmade touch.
You did an amazing job completing your first crochet project. Be proud of your progress, and don’t forget to share your creation you’ve officially started your crochet journey
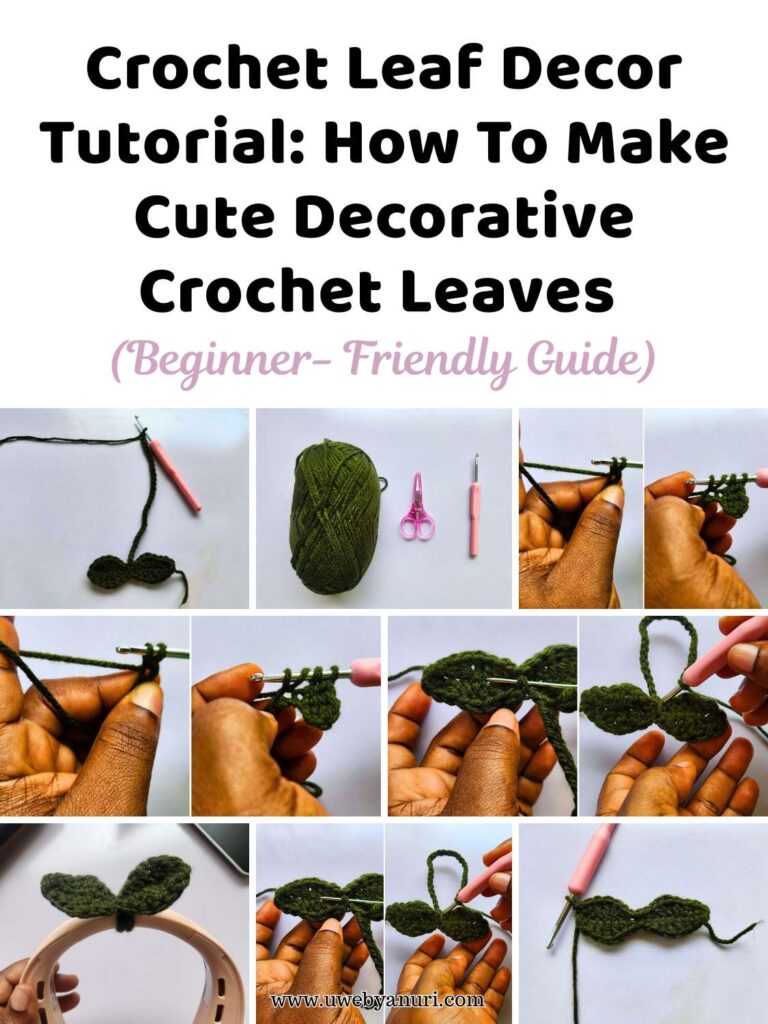
If you enjoyed this, check out other fun projects to continue building your skills, like the Crochet Scrunchie Tutorial or the Crochet Leaf Deco Tutorial. Each project helps reinforce the stitches you’ve learned while making something useful and cute.”