

Beginner-Friendly Crochet Card Holder Tutorial
This tutorial will guide you step by step to create a small, stylish crochet card holder. Along the way, you’ll learn the double crochet stitch, an essential crochet technique. Once you master it, you can use the same skills for other projects like phone pouches or mini bags.
If you’re new to crochet or still finding your rhythm, CHECK HERE don’t worry at all. Everyone starts somewhere, and every project you finish builds your confidence little by little. Crochet is meant to be relaxing, not stressful, and this project is a perfect place to begin.
In this tutorial, we’re going to make a simple crochet card holder using basic stitches and easy steps. This is one of those projects that looks neat and useful but doesn’t require advanced skills. It’s small, practical, and very beginner friendly. Whether you want to keep your cards organized, make a handmade gift, or simply practice your stitches, this project is a great choice.
I’ll guide you through everything slowly and clearly, from creating your slip knot all the way to seaming the panels together. Take your time, pause when you need to, and don’t worry if your stitches aren’t perfect. Crochet has a bit of stretch and personality, and things always look better once everything comes together.
See more; How to read crochet abbreviation beginner friendly
Materials You’ll Need
- Medium-weight yarn (also called Aran weight or category 4) – lighter or solid colors work best for beginners so you can see your stitches clearly.
- Crochet hook – 5.0 mm or 5.5 mm inline hook recommended. Inline hooks have a pointed tip and a deep groove, making it easier to pull yarn through loops.
- Scissors
- Tapestry needle for weaving in ends
Step 1: Making a Slip Knot and Holding the Yarn
- Place the yarn tail on your left and the working yarn on your right.
- Wrap the yarn around your index finger to form a loop, then slide the loop off your finger.
- Pinch the crossing point with your left hand to keep the loop in place.
- Hold the crochet hook in your right hand, insert it into the loop, and pull the yarn through.
- Tighten gently by pulling both the tail and working yarn, leaving a small space on the hook.
Tip: Keep your left index finger lifted to help guide the yarn and maintain even tension.
Step 2: Creating the Foundation Chain
- Extend your left hand and guide the yarn between your pinky and ring finger.
- Bring the yarn over your index finger, and hold the slip knot lightly with your thumb and middle finger.
- Make a chain of 21 stitches (or adjust based on your item size). Place your card or phone in front of you to ensure the chain is wide enough.
- To make a chain stitch, hook the yarn from back to front, pull it through the loop on the hook, and repeat.
Your foundation chain will form the bottom edge of the card holder.
Step 3: Double Crochet First Row
- Skip the first chain closest to the hook. Insert your hook into the second V shape from the hook.
- Yarn over, pull through the stitch (two loops on your hook).
- Yarn over again and pull through both loops. That’s your first double crochet!
Repeat this process along the row, inserting the hook into each chain stitch. Keep the loop on your hook slightly loose, and maintain a gentle lift of the left index finger for tension. Continue until you have 20 double crochet stitches in the row.
Tip: Your first few stitches may look uneven that’s completely normal. You’ll develop a rhythm as you practice.
Step 4: Continuing Rows
- At the end of the first row, make one chain stitch and turn your work.
- Work one double crochet into each stitch space from the previous row (the space just below each V).
- Repeat the chain stitch, turn, and double crochet process for subsequent rows.
Pattern:
- 20 double crochet stitches
- 1 chain stitch
- Turn your work
We recommend working 14 rows for this card holder, but feel free to adjust based on the size you need.
Step 5: Finishing the First Panel
- After the final row, pull the loop slightly longer to secure it.
- Compare the panel’s height with your card and add a row if necessary.
- Cut the yarn and weave in the ends using a tapestry needle: thread the tail, gently pass it through nearby stitches on the back, then trim any excess.
Your first panel is now complete! Don’t worry if it curls slightly; this will smooth out when the panels are joined.
Repeat the same steps to make a second matching panel.
Step 6: Seaming the Panels
- Fold in the edges where the yarn tails are tucked to hide rough spots.
- Use a contrasting yarn if you want to see your seam clearly.
- Insert your hook into the first stitch of one panel, then into the corresponding stitch on the second panel. Pull the yarn through to make one loop on the hook.
- Hold the yarn and panels steady, then work a double crochet to join the two stitches. Continue this along the edge, working one double crochet into each stitch until the first side is complete.
Step 7: Turning Corners
- When you reach a corner, work three double crochet stitches into the same corner stitch. This helps the fabric turn smoothly.
- Continue along the edge, repeating the process for all sides:
- One double crochet per stitch along straight edges
- Three double crochets in each corner
Step 8: Finishing the Card Holder
- After completing the last stitch, cut the yarn and weave in any remaining loose ends.
- Smooth out the panels if needed.
Congratulations! Your crochet card holder is now complete. Slide your cards inside and enjoy your handmade accessory. This project is not only practical but also a great way to practice double crochet and seaming skills.
Final Thoughts
You did an amazing job finishing this crochet card holder. Completing a full project, even a small one, is a big step in your crochet journey. Every stitch you make builds skill, confidence, and creativity.
If you enjoyed this project, try experimenting with different yarn colors or adding a simple border next time.
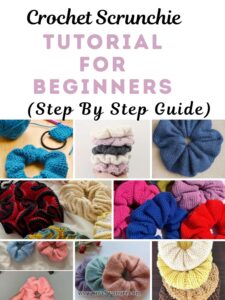
you may also love; crochet scrunchie tutorials for beginners. Crochet is all about learning by doing, and you’re already on the right path.
Thank you for crocheting along with me. I can’t wait to see what you make next.
One Comment